Day 56: Beautiful Bangkok – in black & white and color.

Three days in Bangkok is definitely not enough. Add in some serious jet-lag after a flight from Toronto (Canada) to Abu Dhabi (UAE), then onward to Bangkok.

Wow – Bangkok is absolutely amazing. We only saw a tiny part of the City, and what we saw is so diverse and sensory stimulating; sight, smell, taste, sounds and touch.

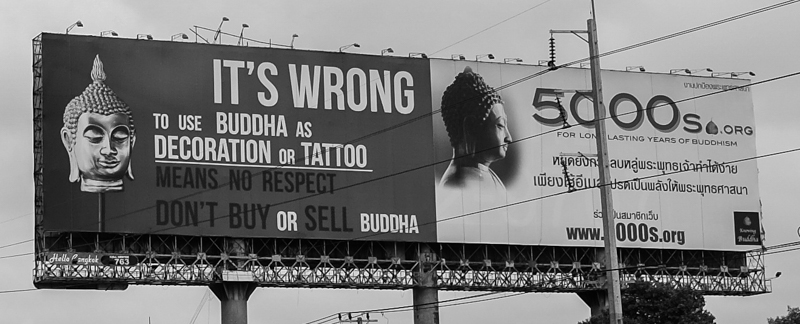
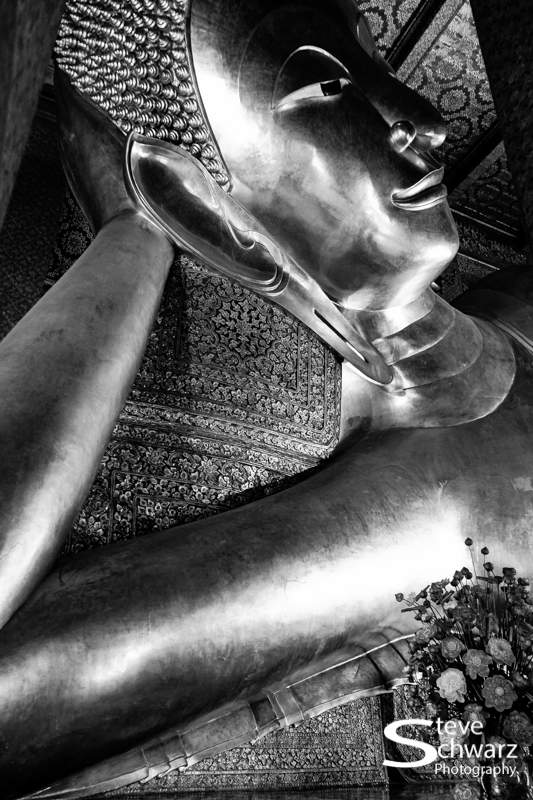
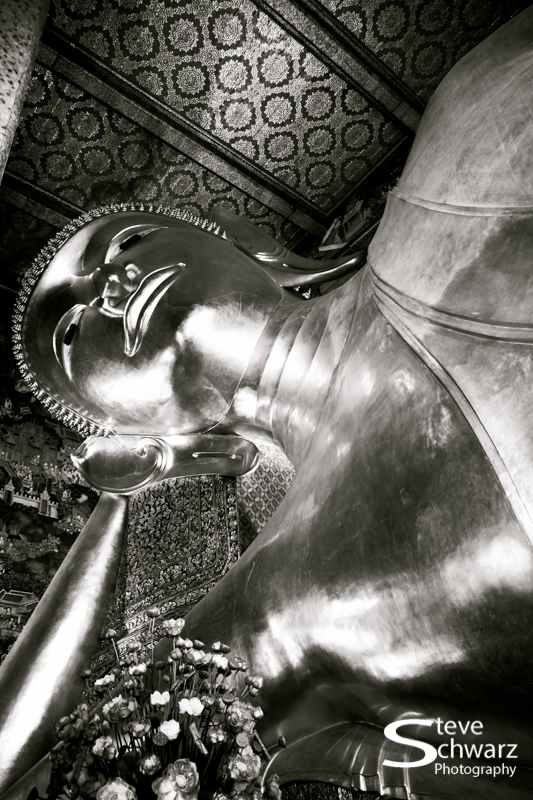
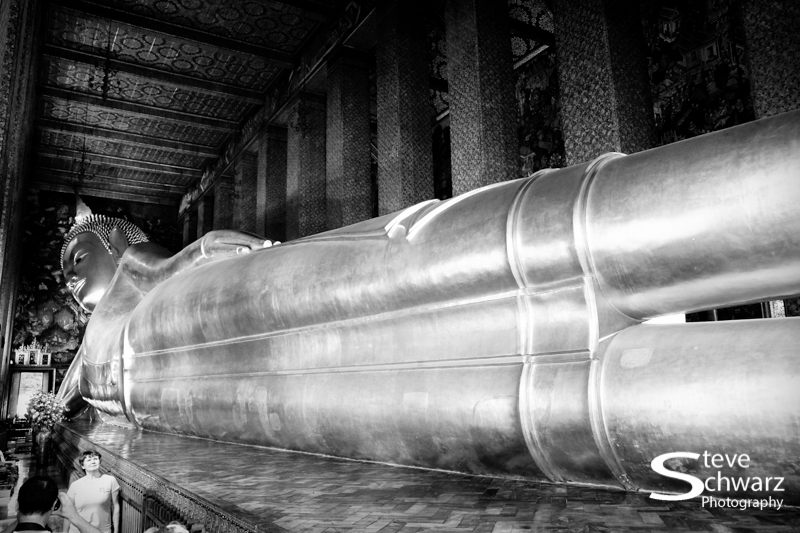
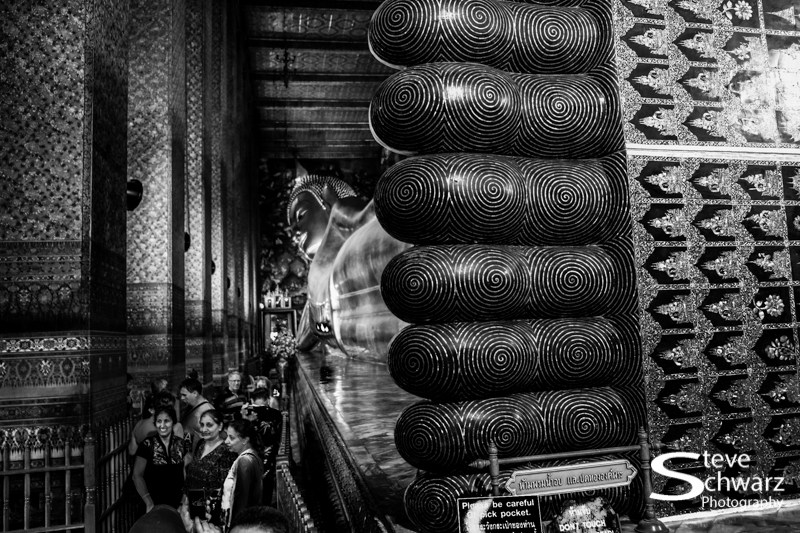
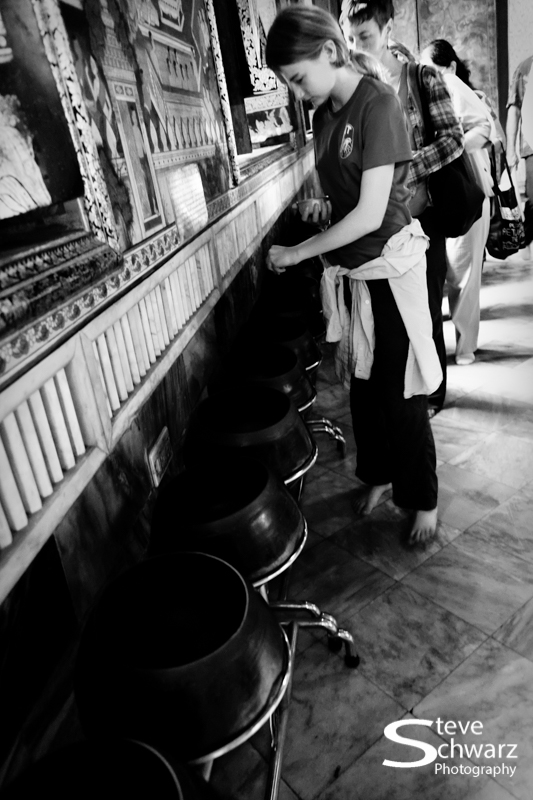
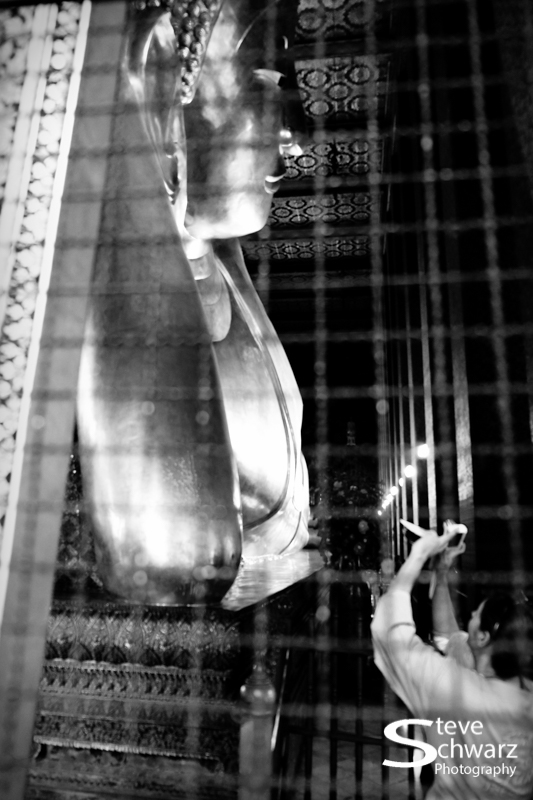
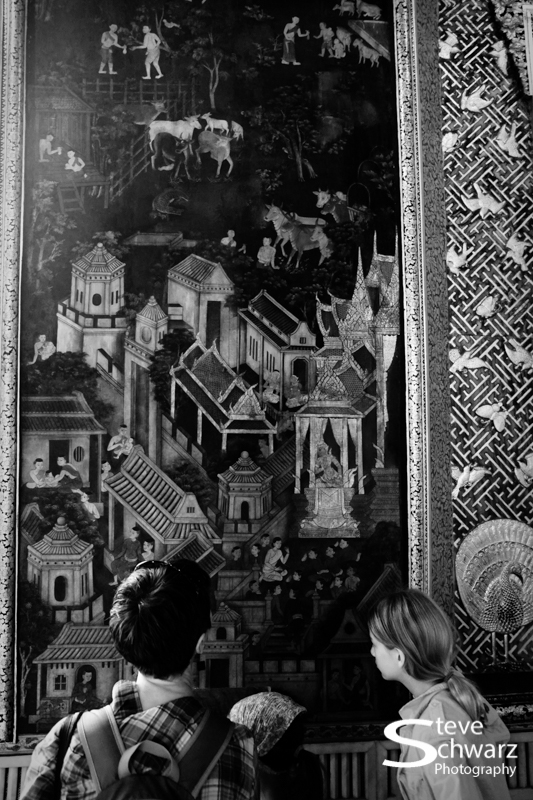
The tiny part of Bangkok that we experienced was the Pranakorn district, and we explored Khao san Road and the cultural sites in the Rattanakosin area including The Grand Palace, The Temple of The Reclining Buddha (Wat Pho), The Royal Ground,  The Democracy Monument and the Chatuchak Weekend Market.

The next post will have photos from Wat Pho, ‘Temple of the Reclining Buddha’.

All photos taken with a Fuji X-series X-Pro1 with Fuji 18-35mm, or Fuji X-series X-E1 with Fuji 14mm lens. Some of the photos are in black  & white, and some are in color,  with notes below.

SHSA8600

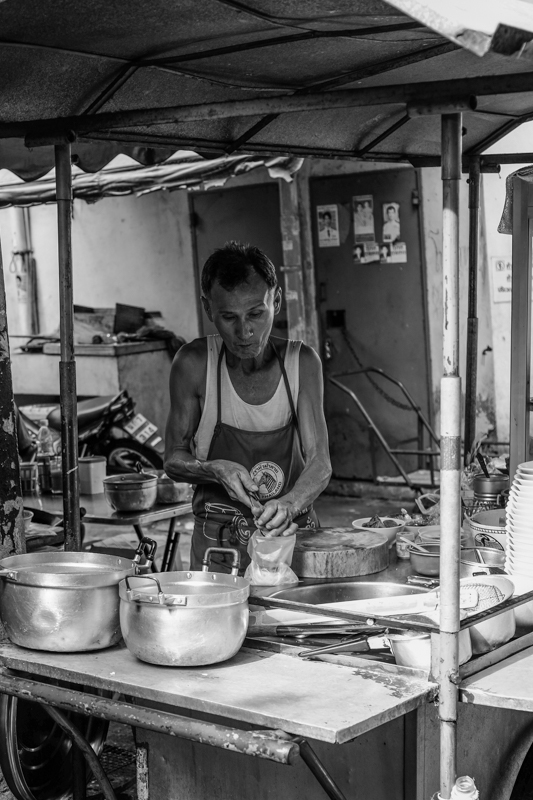
A typical food stall on a side street in Bangkok. On the original color photo, the sun was shining through a blue tarp causing the man’s skin to have a blue tinge. In color, the blue tinge was unacceptable and the image could not be used. Converted to black and white the blue tinge is gone, and the photo is quite usable.

SHSA8604-2

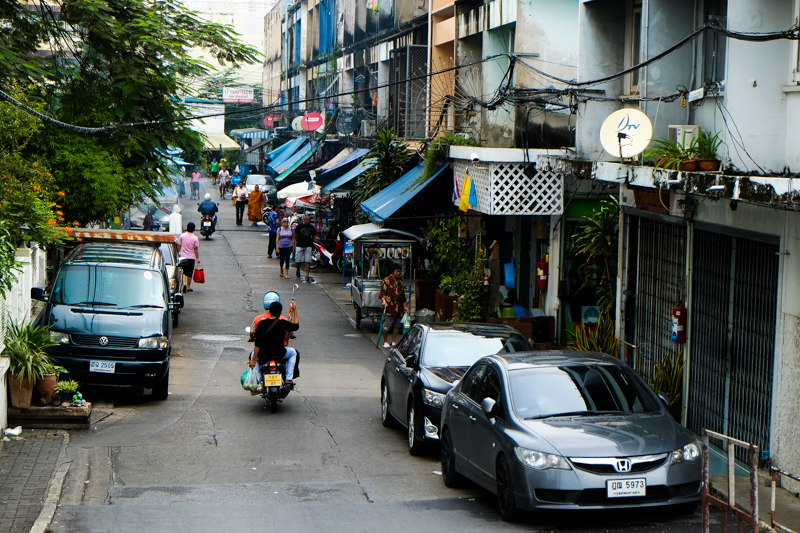
A small side street in Pranakorn district.

SHSA8626-2

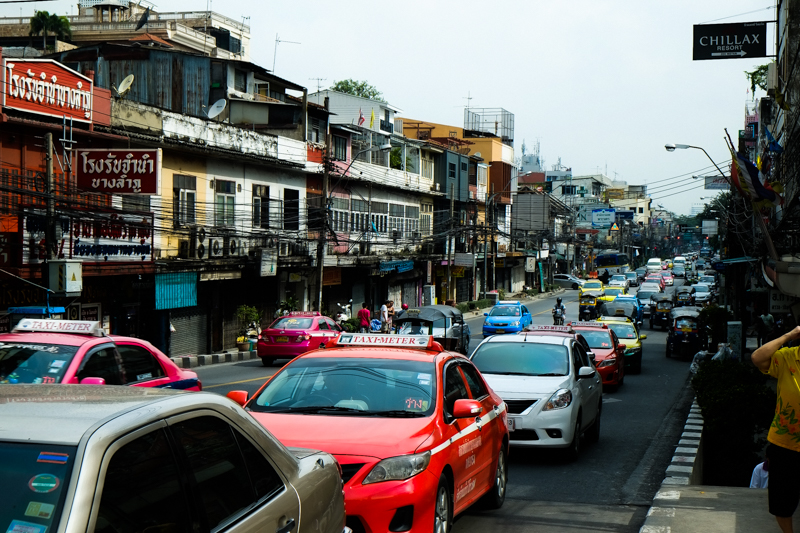
Good luck trying to cross the Prachathipatai Road, and remember to look Right – then Left (opposite from North America).

SHSB7512-2

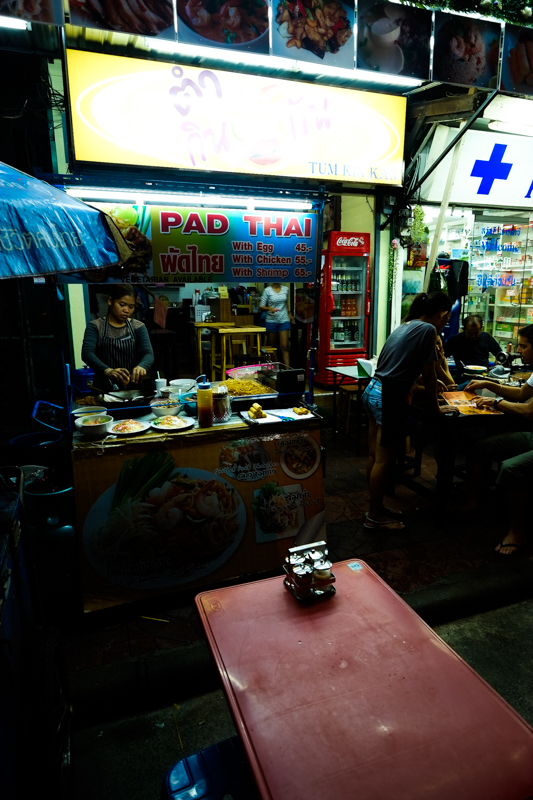
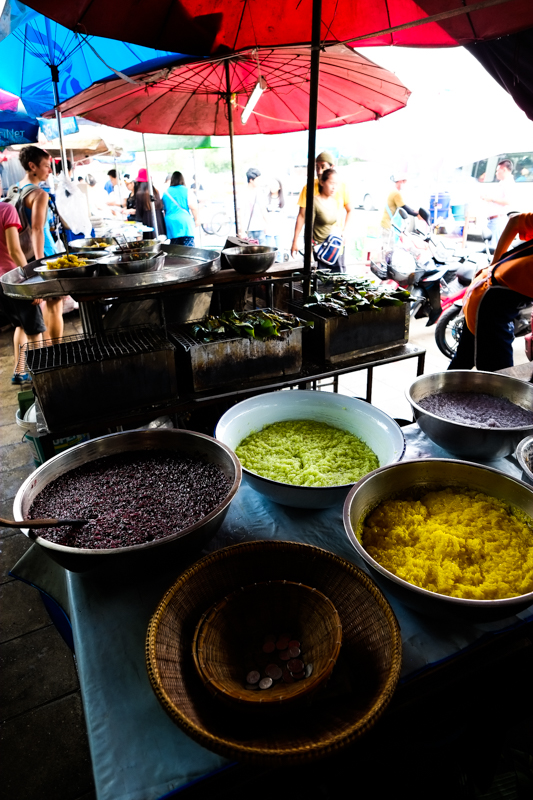
Authentic Pad Thai at a food stall on Khao san Road, in central Bangkok. In former times the street was a major Bangkok rice market, and had now become a “backpacker ghetto”; with cheap accommodation, tour buses depot, many pubs and bars, and small shops that sell everything from handcrafts, paintings, clothes, local fruits, pirated music on DVDs, and second-hand books. At night, the streets turn into bars and music is played, food hawkers sell barbecued fish, insects, and other exotic snacks.

SHSB7513

One of the many food stalls on Khao san Road

SHSB8929-2

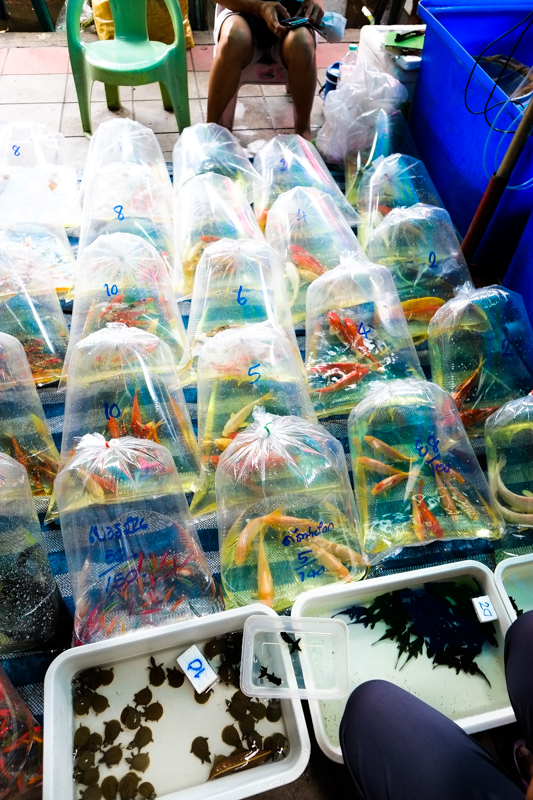
Fish in bags at Chatuchak Weekend Market. Chatuchak Weekend Market is one of the world’s largest weekend markets and contains more than 15,000 booths selling goods ranging from Amulets, antiques, art, books, collectibles, clothes, food shops, furniture, handicrafts, home décor, household appliances, and pets. We saw many species of exotic birds, squirrels, and large turtles selling for 60,000BHT.

SHSB8931-2

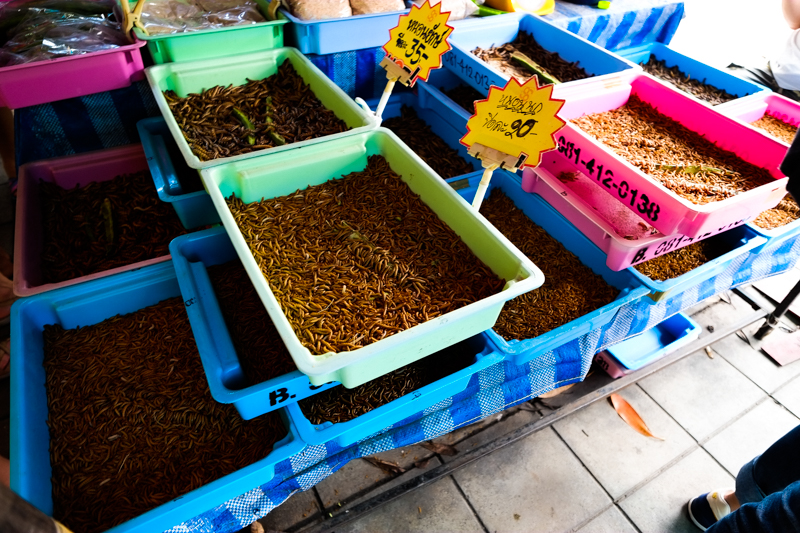
Pet food ?? at the Chatuchak Weekend Market

SHSB8941-2

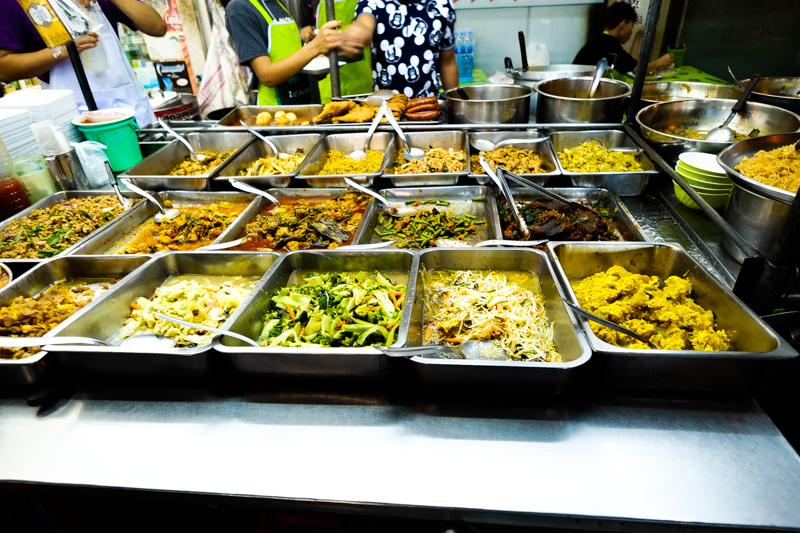
Delicious home-made Thai food at the Chatuchak Weekend Market. Food stalls are an orgy of color, which can sometimes look good in black in white, though how would you tell the food apart if they were all shades of grey ?.

SHSB8943

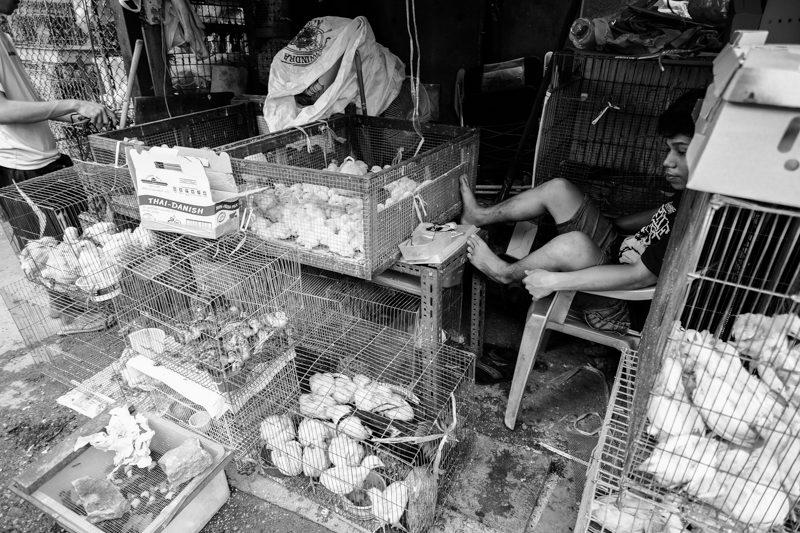
Boy selling ducks at Chatuchak Weekend Market. The original color version of this photo was had a overwhelming range of color, all of which was too distracting to the story – a boy selling ducks at the market.

SHSB8982

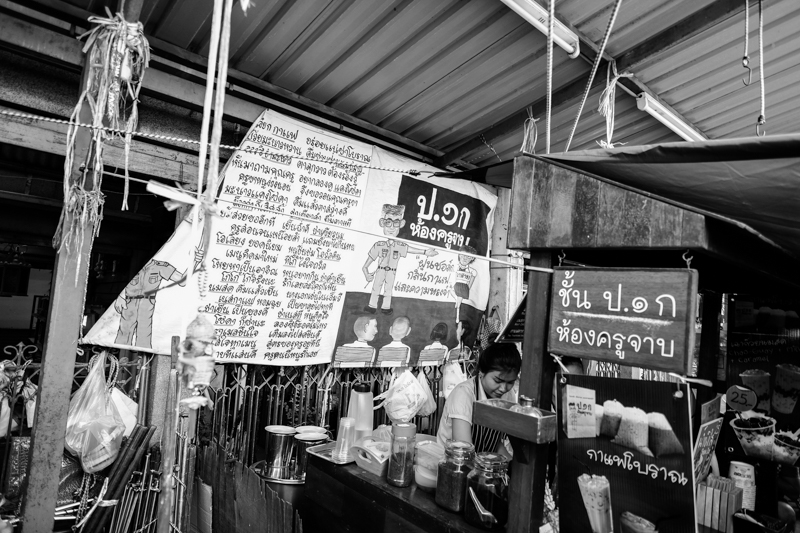
I am not sure what the sign says. Any one read Thai ?

SHSB8993-2

Pan fried Quail eggs at a food stall in the Chatuchak Weekend Market

SHSB9029-2

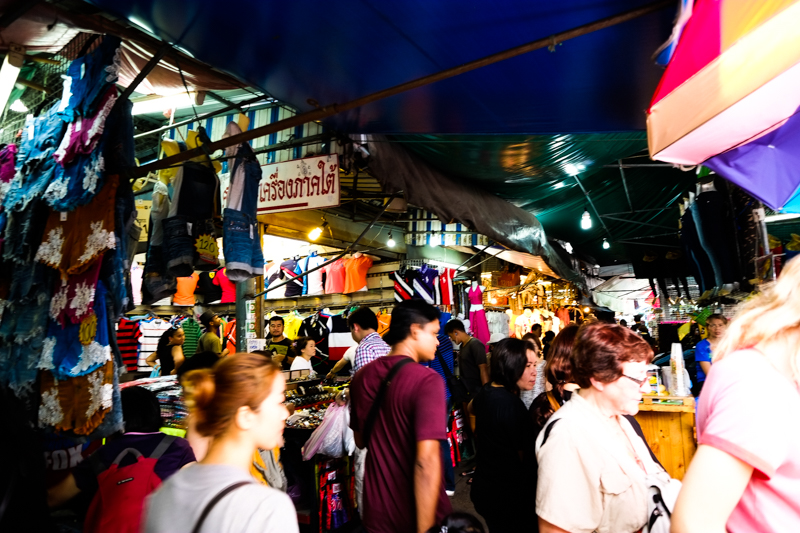
Inside view of the chaos inside the huge Chatuchak Weekend Market

SHSA8823-2

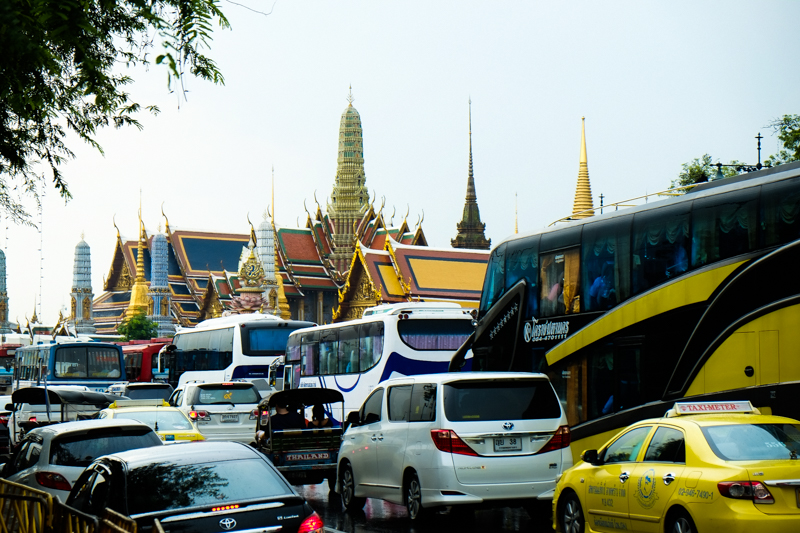
The Grand Palace is a complex of buildings at the heart of Bangkok, Thailand. The palace has been the official residence of the Kings of Siam since 1782.

SHSB8916-2

View from the ‘Bearing’ BTS station

SHSB9118-2

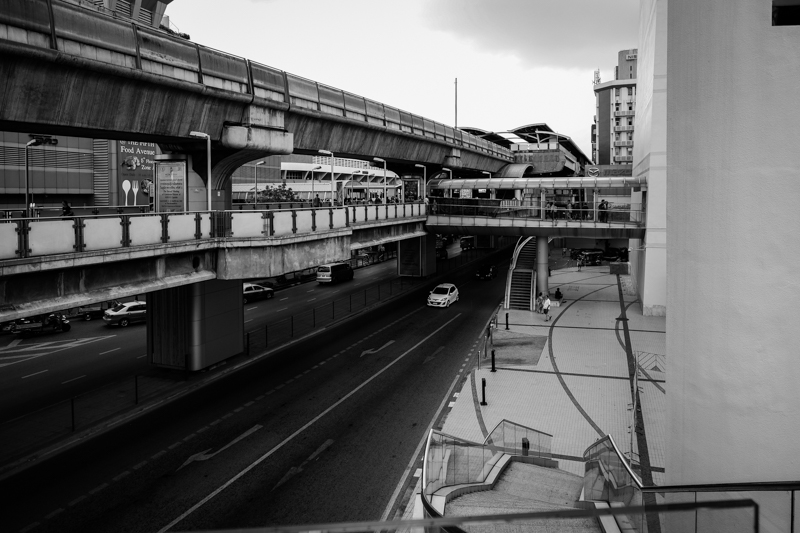
Above ground BTS track, and MBK Shopping Center in the distance. There wasn’t much color in the original photo – shades of bleck grey concrete. In black and white, the tones, and shades are more powerful.

SHSA8646

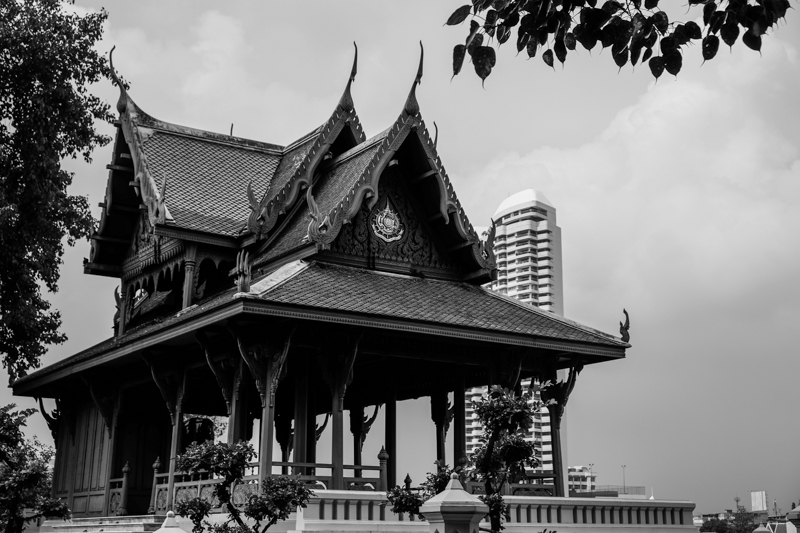
‘Old and New’. Wooden Wat (Temple) from several 100 years ago, with a modern structure (apartment building). In black and white, the orange-red-gold colors on the temple are now the same shade as the more modern, and drab colored building in the background.

SHSA8819

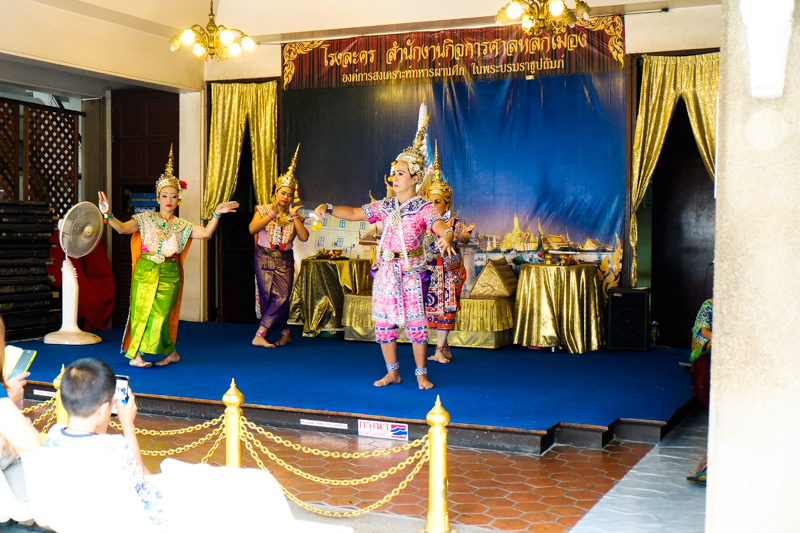
Traditional Thai show. Not sure that the show was about ??

SHSA8889-2

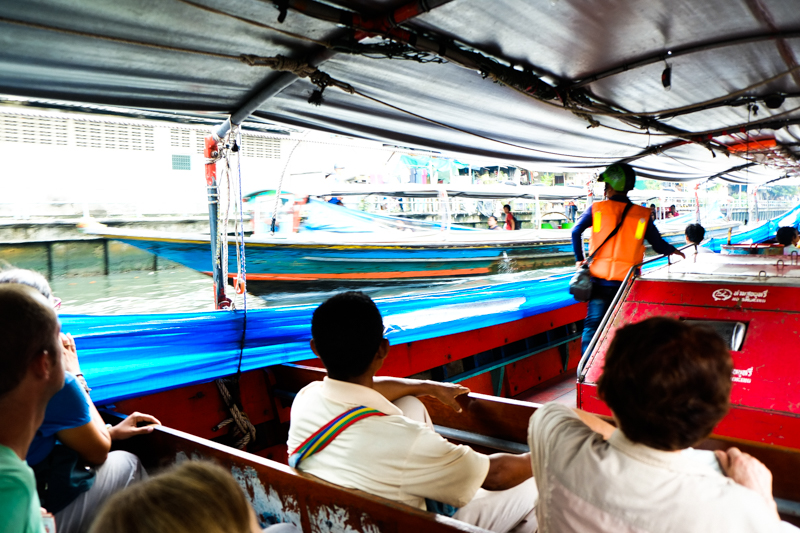
Boat taxi. In many ways, similar to a city bus on a scheduled route, though speeding through the canals and the fee collector wears a life jacket and a helmet.

SHSB9091-2

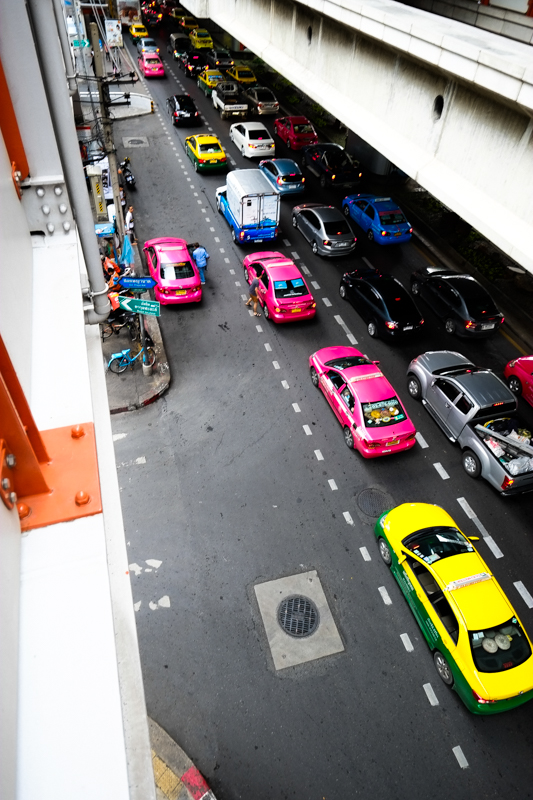
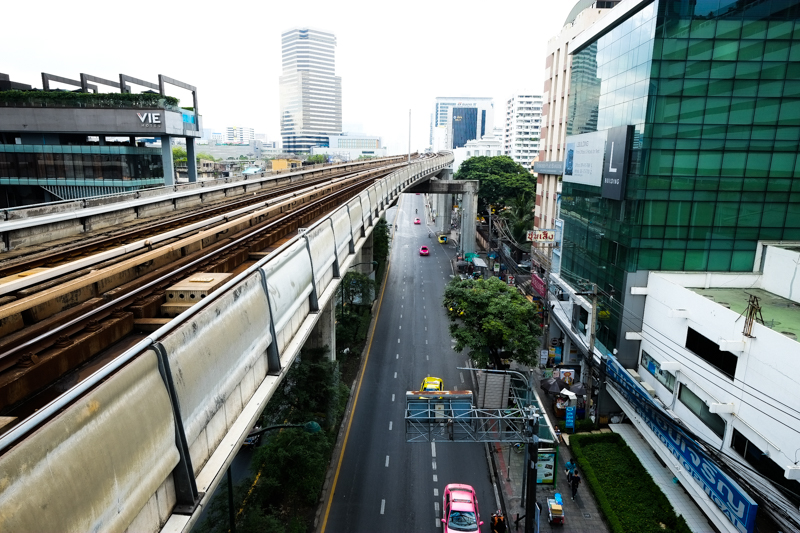
A busy street in Central Bangkok. I love the colors of the cars and taxis; bright pink, and bright yellow. This photo would also look Ok in black and white, showing the range of shades of gray, though in color the insane colors of the cars would be lost.

SHSB9110-3

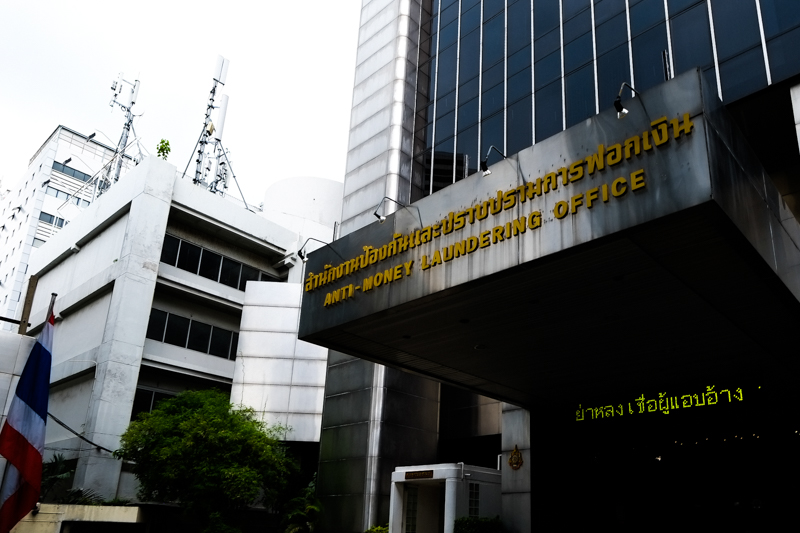
A fancy building in downtown Bangkok – Of course, the ‘Anti-Money Laundering Office’.

SHSB7492

Day 55: Wat Pho (‘Temple of the Reclining Buddha’)

The Wat Pho or “Temple of the Reclining Buddha” is the largest and oldest wat (temple) complex in Bangkok, and it houses more than 1,000 Buddha images that were moved from abandoned temples in Ayutthaya and Sukhothai by order of King Rama I. Wat Pho, officially named Wat Phra Chetuphon Wimonmangkhalaram is one of the six temples in Thailand that are of the highest grade of the first class Royal temples.

The temple is renowned for the enormous gold plated Reclining Buddha image that was built during the reign of King Rama III (1824 – 51) and represents the passing of the Buddha into final Nirvana after death. The Reclining Buddha, is 46 meters long and 15 meters high and is the largest Buddha image in Thailand. Constructed out of plaster around a brick core, the reclining Buddha is decorated with gold leaf and his eyes and foot soles are inlaid with mother-of-pearl.

The Buddha’s feet are 5 metres long and are divided into 108 arranged panels, each exquisitely decorated in mother-of-pearl illustrations of symbols by which Buddha can be identified like flowers, dancers, white elephants, tigers and altar accessories.

There are 108 bronze bowls in the corridor indicating the 108 auspicious characters of Buddha. Visitors drop coins in to each of these bowls in belief that this will bring good fortune, and to help the monks maintain the wat. The sound of these falling coins is quite distinctive and can be heard throughout the temple.

Now – on to the photos.

SHSA8706-9

Side view of the Reclining Buddha

SHSA8709-54   SHSA8713 SHSA8714-24 SHSA8724 SHSA8737


SHSA8710

Yes, All the photos are in black & white. Why ?

1) The color versions of the photos do not show the stark beauty of the gold plated Reclining Buddha image or the intricate paintings on the walls. You simply have to go there yourself, and don’t simply look at on-line photos. In black and white – you have to use your imagination.

2) The photo are also in black and white because there were so many jack-asses inside the temple, photographing the Buddha  using the flash on their cameras. Flash-Flash-Flash…..and more Flash, Flash, Flash…..on and on. This is really disturbing – and for me really the flash really destroys the moment of appreciating the Reclining Buddha.  How can appreciate the beauty, when the other tourists beside are taking a bunch of photos, and each time the flash reflects off the golden Buddha and blinds you !.

So – end of my Rant. Other tourists, don’t be a jack-ass, and try to be considerate of others !.

Adding Light using Flash

When the Light isn’t Right: Photography in low light or too much light.

Any keen photographer will tell you that the best light for photography is the ‘magic-hour’ at sunrise and at sunset, and that mid-day or low-light photography should be avoided. For the rest of us, there is a whole day in between and, like it or not, it is our only opportunity to get photos. We simply can’t put life on-hold to wait for the so-called magic-hour. So, how do you get good photos when the light isn’t Right ?.

At any given light, good light or bad light, camera exposure is based on three variables;

  1. Shutter speed (how long the shutter is open). Faster shutter speeds can freeze motion are used when there is good light, where as slower shutter speeds blur moving objects. You might have already noticed that some of you low light photos are blurry. This is because a slow shutter speed is required in low light conditions to allow enough light into the camera for proper exposure. Unless you have a tripod, the shutter speed should be 1/ the focal length of the lens, e.g. a 250mm lens would require a minimum shutter speed of 1/250sec.
  2. Aperture (how much light comes in the lens). In good light conditions, the lens can be intentionally stopped-down (higher aperture number) to reduce the amount of light entering the camera, and increase the depth of field.
  3. ISO or film speed (how sensitive the sensor of film is to light).  Lower the ISO the better. Higher ISO (800, 1200 and higher) adjust the sensitivity of the camera sensor of film to be more sensitive to light, so that photos can be taken is lower light conditions. Unfortunately, this means more more digital noise, and photos that look murky or muddy.

Adding light by using a flash changes everything. Most digital cameras have built-in flash, so you always have a flash when you need extra light. The down side of built-in flash is the quality of light; harsh and people will have red-eye.

If you can, buy a hand held flash unit and a cable to connect the flash to the camera or wireless trigger. This is called off-camera flash. Once you get into it – there is no going back.

Adding Flash

As mentioned above, adding flash (assuming off-camera flash), changes everything for camera exposure. Depending on your camera, flash units are synched to fire at 1/60, 1/125 or 1/250 of a second. If you set your shutter speed higher than your camera’s synch speed the image will be black, or partially black since the flash fired while the the shutter was already closing.

When using a flash, your can set the camera to Auto, or Program and let the camera work out the correct exposure, or set the camera to M for Manual so you can maximize the creative opportunity to over or under expose the background and make the foreground have more ‘Pop’.

In Manual mode

1) Set the shutter speed to the camera’s flash sync speed. You might have to refer to the camera manual to determine your cameras sync speed.

2) Point the camera at the background and set aperture according to the cameras light meter. Do not adjust the ISO – low number is better. The camera is now set to the correct exposure for the background. Some photographers call this “ambient exposure”.

3) Now turn on your flash. It can be set to automatic (TTL) where the flash power is controlled by the camera. This is useful for moving subjects. Setting the flash to Manual means that the flash power is controlled by you. This mode is most useful for portraits, or where you want to fine tune the exposure.

Assuming that you want control over the flash power, now it gets really fun and also a bit complicated.  One step at a time.

  • a) Flash in manual mode means you control the Flash Power. Typical flash power settings are 1/1 (full power), 1/2, 1/4, 1/8, 1/16.
  • b) Off camera flash means you control the Direction of the flash hitting the subject.
  • c) Off camera flash means you control the Flash-Subject Distance. Flash held closer to the subject means less flash power is needed, distant subjects will require more flash power for proper exposure.
  • d) Assuming that your camera is also in Manual mode, with shutter speed set to sync speed. The lens Aperture (controls how much light enters the camera), and also be used to control exposure.  If the subject is overexposed, then reduce the aperture (turn to higher aperture number) : e.g. change aperture f/5.6 to f/8. If the subject is underexposed, then increase aperture.

e)  Other ways to change effect of the flash

  • 1) How does the light from the flash hit the subject. Is the light harsh, creating dark shadows, or more soft with smooth transitions on the subject. Add a diffuser (e.g. softbox or umbrella) to reduce harsh shadows.
  • 2) Coverage: is the flash directed at the entire subject, or only on a portion of the subject. Coverage can be modified (reduced) by zooming the flash, moving the flash closer to the subject, or adding a diffuser.


Go ahead – take a photo. See how it looks and make adjustments.