These notes describe the tools and technique that I use to create 360 and spherical panoramas. If you are interested in producing high resolution landscape or architectural panoramas – this is not for you as these types of panoramas require different tools (panorama heads, tripods and lenses). Check out the links below on tools and techniques to create high resolution and architectural (including interior) panoramas.
360 degree panoramas are best described as panoramas that cover up to 360 degrees in a single, super wide image, whereas Spherical panoramas can be described as the viewing of a seamless 360 degree panorama that is displayed on a interactive viewer (e.g. QuickTime VR, Flash or HTML5), and allows the observer (i.e. You) to interactively pan left or right, up and down and zoom in or out to look at the scene in different directions. The end result of spherical panoramas, is to give the observer the feeling of actually “Being there and looking around”.
The first step in making spherical panoramas is to create a seamless 360 photograph, that is wrapped in a sphere or cylinder. There are different methods to capture the separate photos that are stitched to create the seamless 360 degree image; ranging from more accurate (panoramic heads with lens specific clicks) to free hand (dangling a weight from a string over a specific feature on the ground). All methods require that the camera is rotated through an imaginary point ‘entrance pupil’ near the front of the lens to avoid (or minimize) visual off-set (parallax) when stitching the photos. Generally, the fewer images to stitch the less effect of parallax.
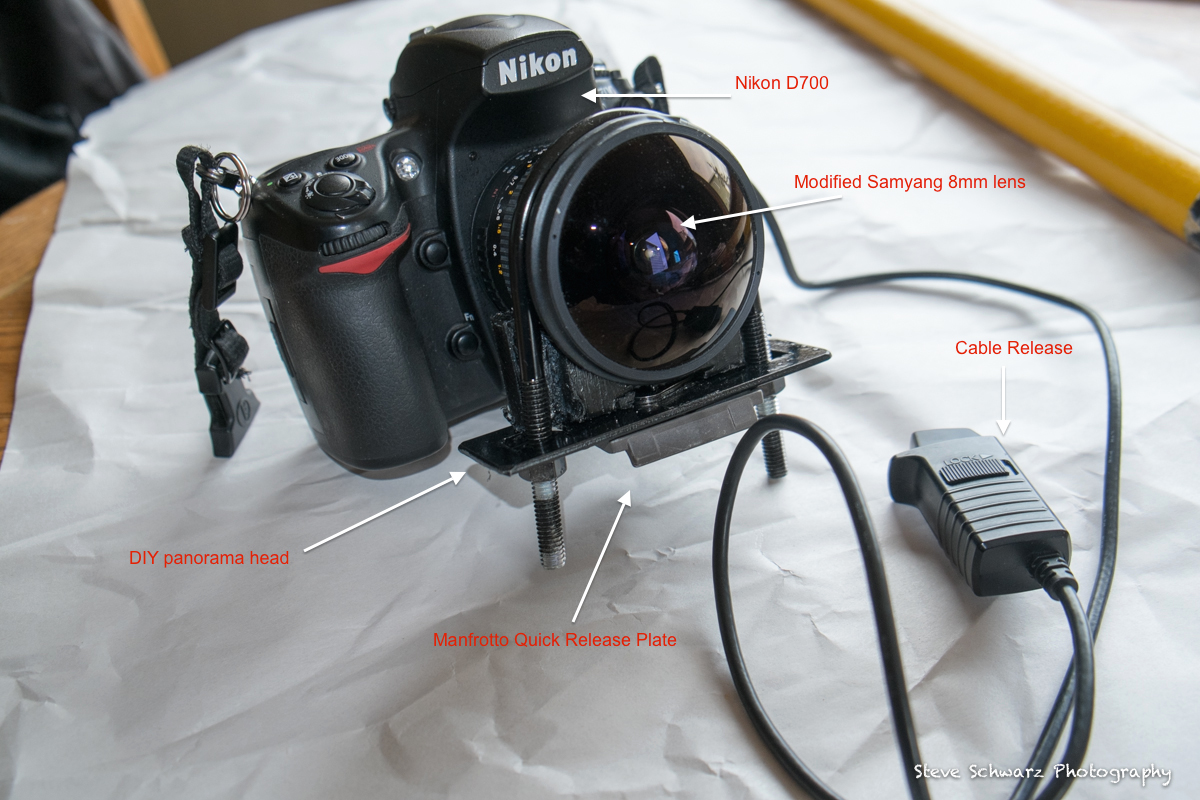
The tools that I use include a Nikon D700 camera, Samyang 8mm f/3.5 lens, a very simply DIY (make-it-yourself) panorama head, remote cable, and a monopole. Previously I did not use a panorama head, and simply mounted the camera to the monopole using the tripod screw on the base of the camera. This method works well as long there are no objects close to the lens (i.e. wide open areas), which cause parallax. Now, with a simple DIY panorama head (total cost approx. $10.00) there are fewer problems with parallax. Do note – that these tools and techniques work for me, and may not work for you, nor is this technique necessarily the correct or most accurate.
From top to bottom, I use the following camera gear and tools.
- Nikon D700
- Cable release
- Modified Samyang 8mm f/3.5 lens. I cut off the plastic lens hood to maximize the field of view. Similar lenses are sold as Rokinon and Bower.
- DIY panorama head (details on construction below).
- Manfrotto Bogen compatible umbrella swivel and Manfrotto 200PL-14 Quick Release Plate.
- Kacey adapter to mount the Manfrotto quick release to a standard paint pole type extension pole. The adapter has a 5/8 standard strobe pin on top and standard extension pole threads (3/4 x 5 threads per inch) on the bottom. Kacey website.
- Monopole (extendable painters pole), purchased at a hardware store.

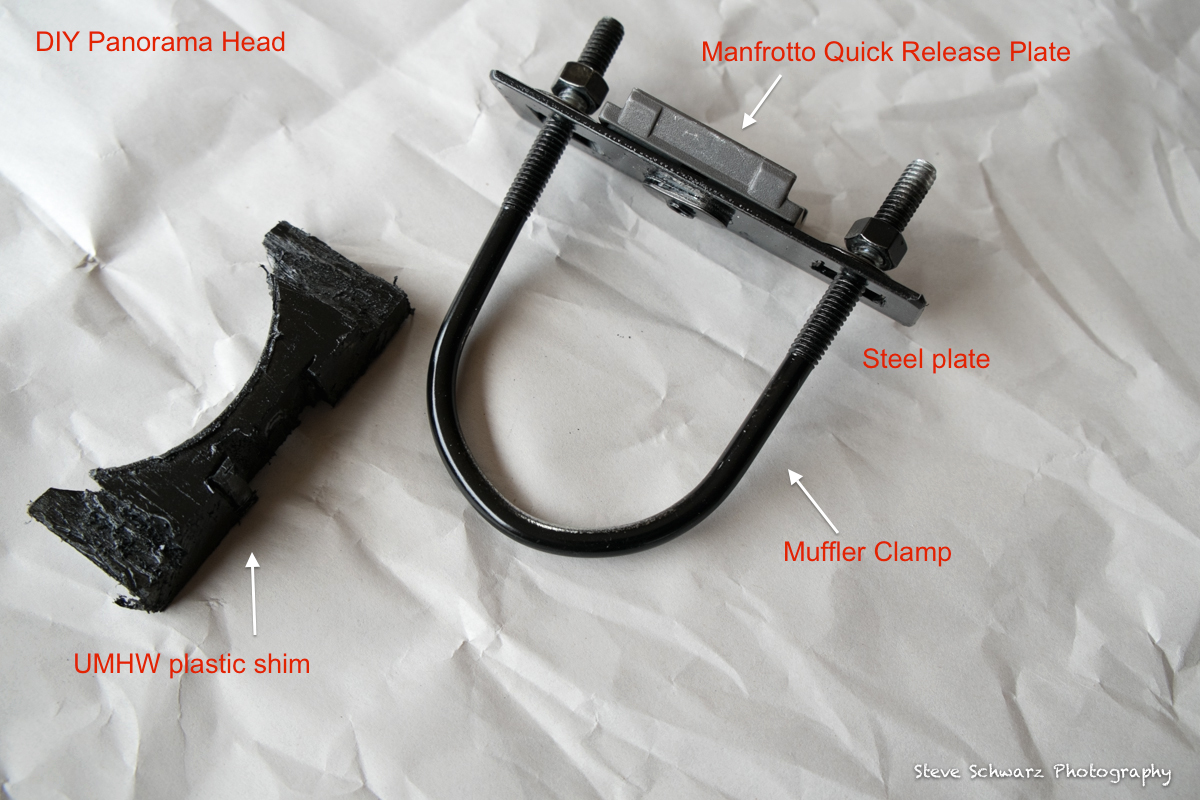
Assembling the DIY Panoramic Head
My initial plan for a DIY panorama head was piece of metal plate that attached at one end to the camera tripod screw the the other end extending to the entrance pupil of the lens. However, the thought of the relatively heavy Nikon D700 bouncing up and down on the metal plate deterred that plan. Plans then turned to some way of attaching the front of the lens directly to the monopole. Then I found a muffler clamp. Sliding the muffler clamp over the entrance pupil of the lens – it was a close fit, and the U-shaped clamp only had to be widened by approximately 0.5cm. Scrap UHMW plastic was used to fill in gaps between the lens and the muffler clamp. A sheet of scrap metal (steel) was cut and drilled for the base, and two ¼ thread nuts are used to tighten the muffler clamp (finger tightened only). A coat of black automotive paint and adding the Manfrotto Quick Release Plate – then done !.
Total cost approx $10.00.
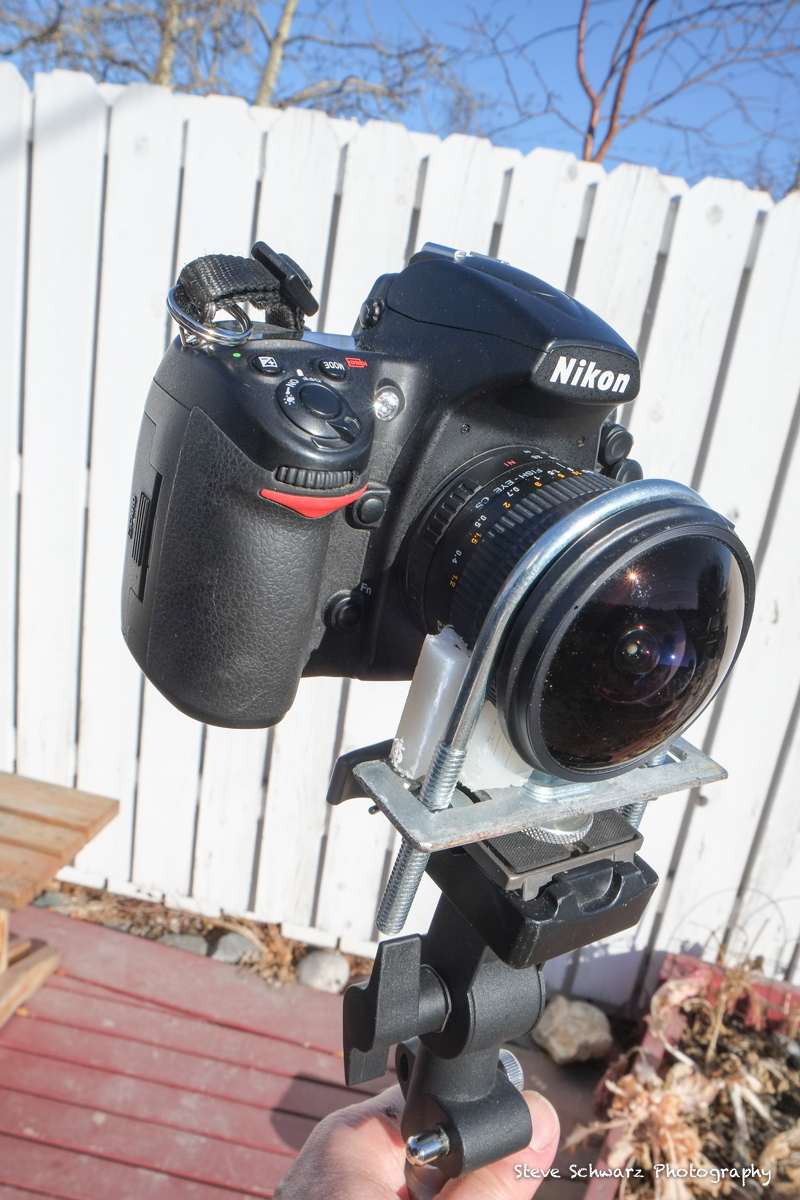 Note that the axis of rotation passes through the centre of the lens and the Nodal Point (entrance pupil).
Camera settings
These are the camera settings that I use;
1) File format set to ‘Raw’
2) Exposure mode set to ‘Manual’ – Set shutter speed minimum 1/30, aperture f/5.6 to f/10 depending on light conditions. Determine exposure for average light reading, not with lens pointed at the sun.
3) Set focus to manual
4) Set camera to full frame mode
Shooting Technique
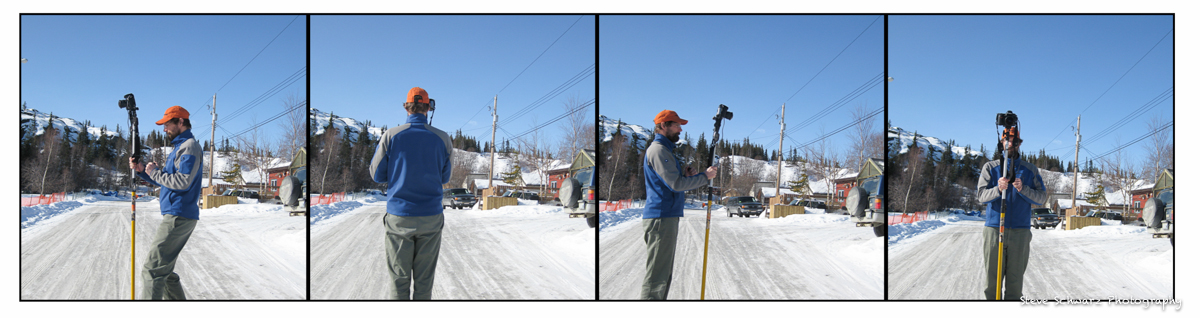
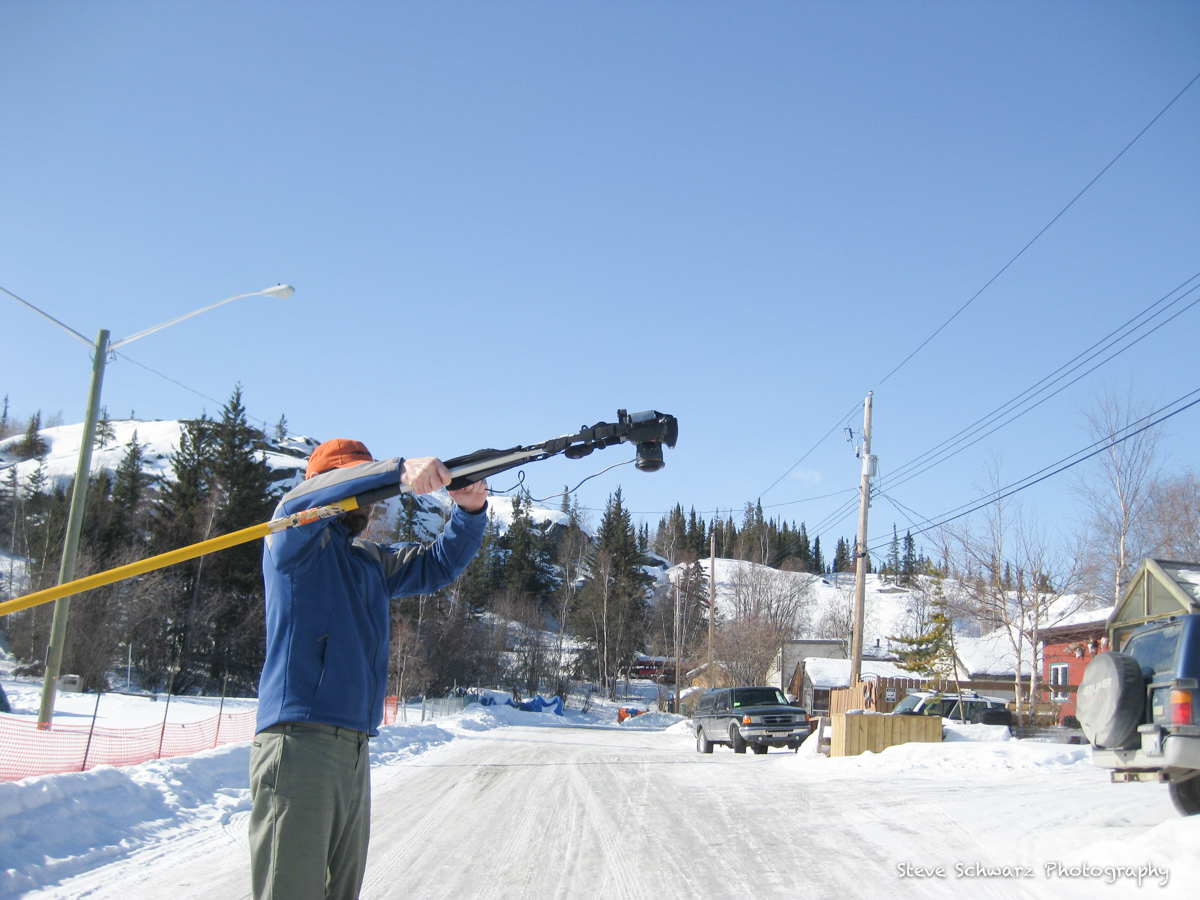
To make my life easier, I always use the same lens and camera combination for spherical panoramas. With the shaved Samyang 8mm, I shoot four images each at 90 degrees apart (camera level).
- Camera settings as above
- Test photos of the scene to set exposure
- Walk to desired location, place the monopole on the ground. Remember the starting direction.
- Press shutter and rotate 90 degrees to the right (clockwise).
- Stabilize monopole, repeat 90 degree rotation and press shutter,
- Continue until back to starting point
- Done…walk away Click on the photo below to see it bigger.
 Depending on the scene, I might add two additional photos:
- Step back and take a Nadir shot (-90) by holding the monopole at arms length and point camera down to where the monopole was rotated in previous steps, at approximately the same height as the monopole, to create a foot-free image and,
- Take a Zenith or straight up (+90 degrees) shot by tilting the camera up 90º (approximately over the rotation point), duck down, and shoot it. Zenith shots are only taken when in an enclosed space.
One I have the four (or six) photos, they are loaded into PTGui software to create the seamless 360 degree panorama and the spherical panorama. Check the links below for how to use PTGui software. PTGui saves the spherical panorama as a Flash (.swf) movie that can be displayed on a website.
Examples of Flash (.swf) movies
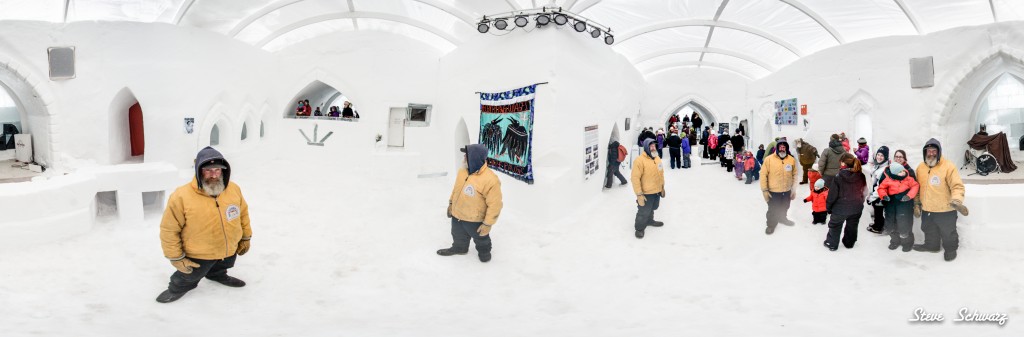
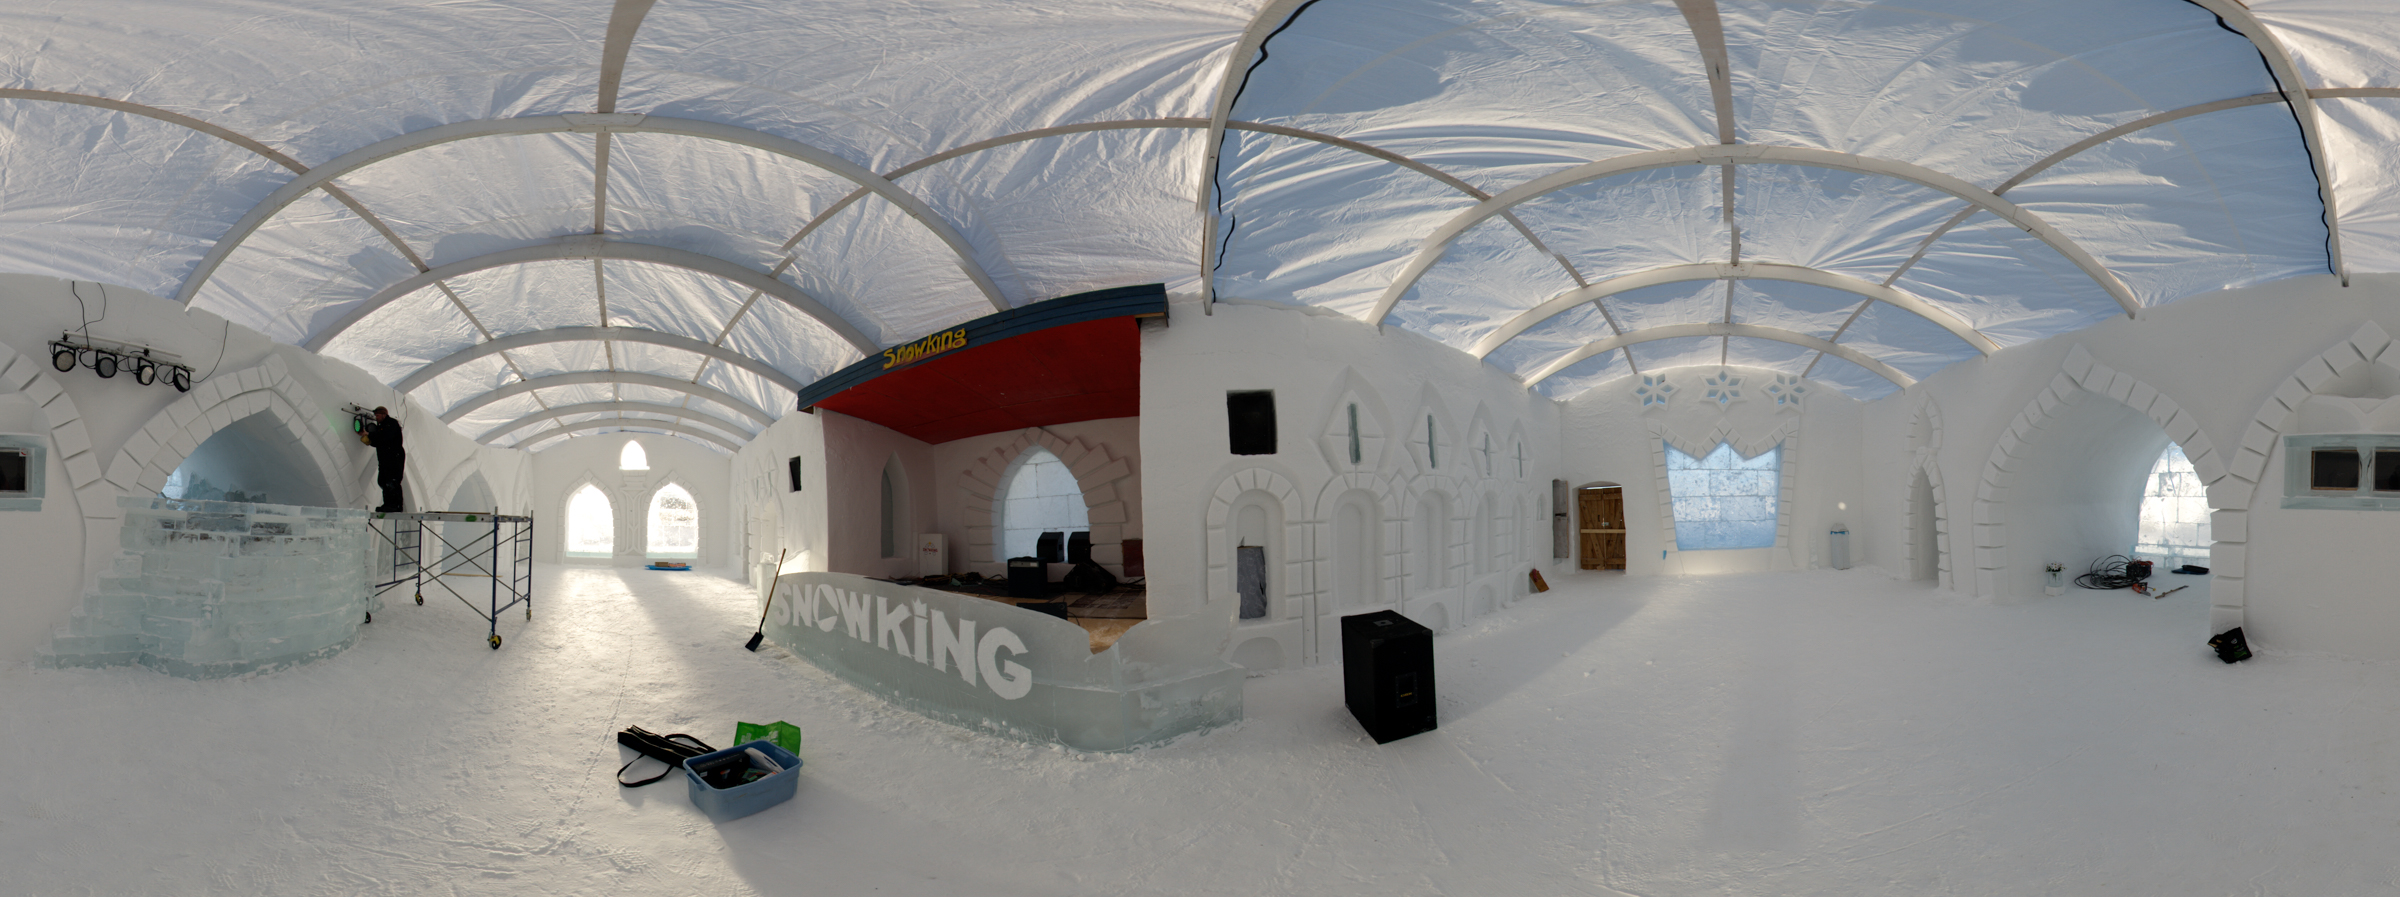
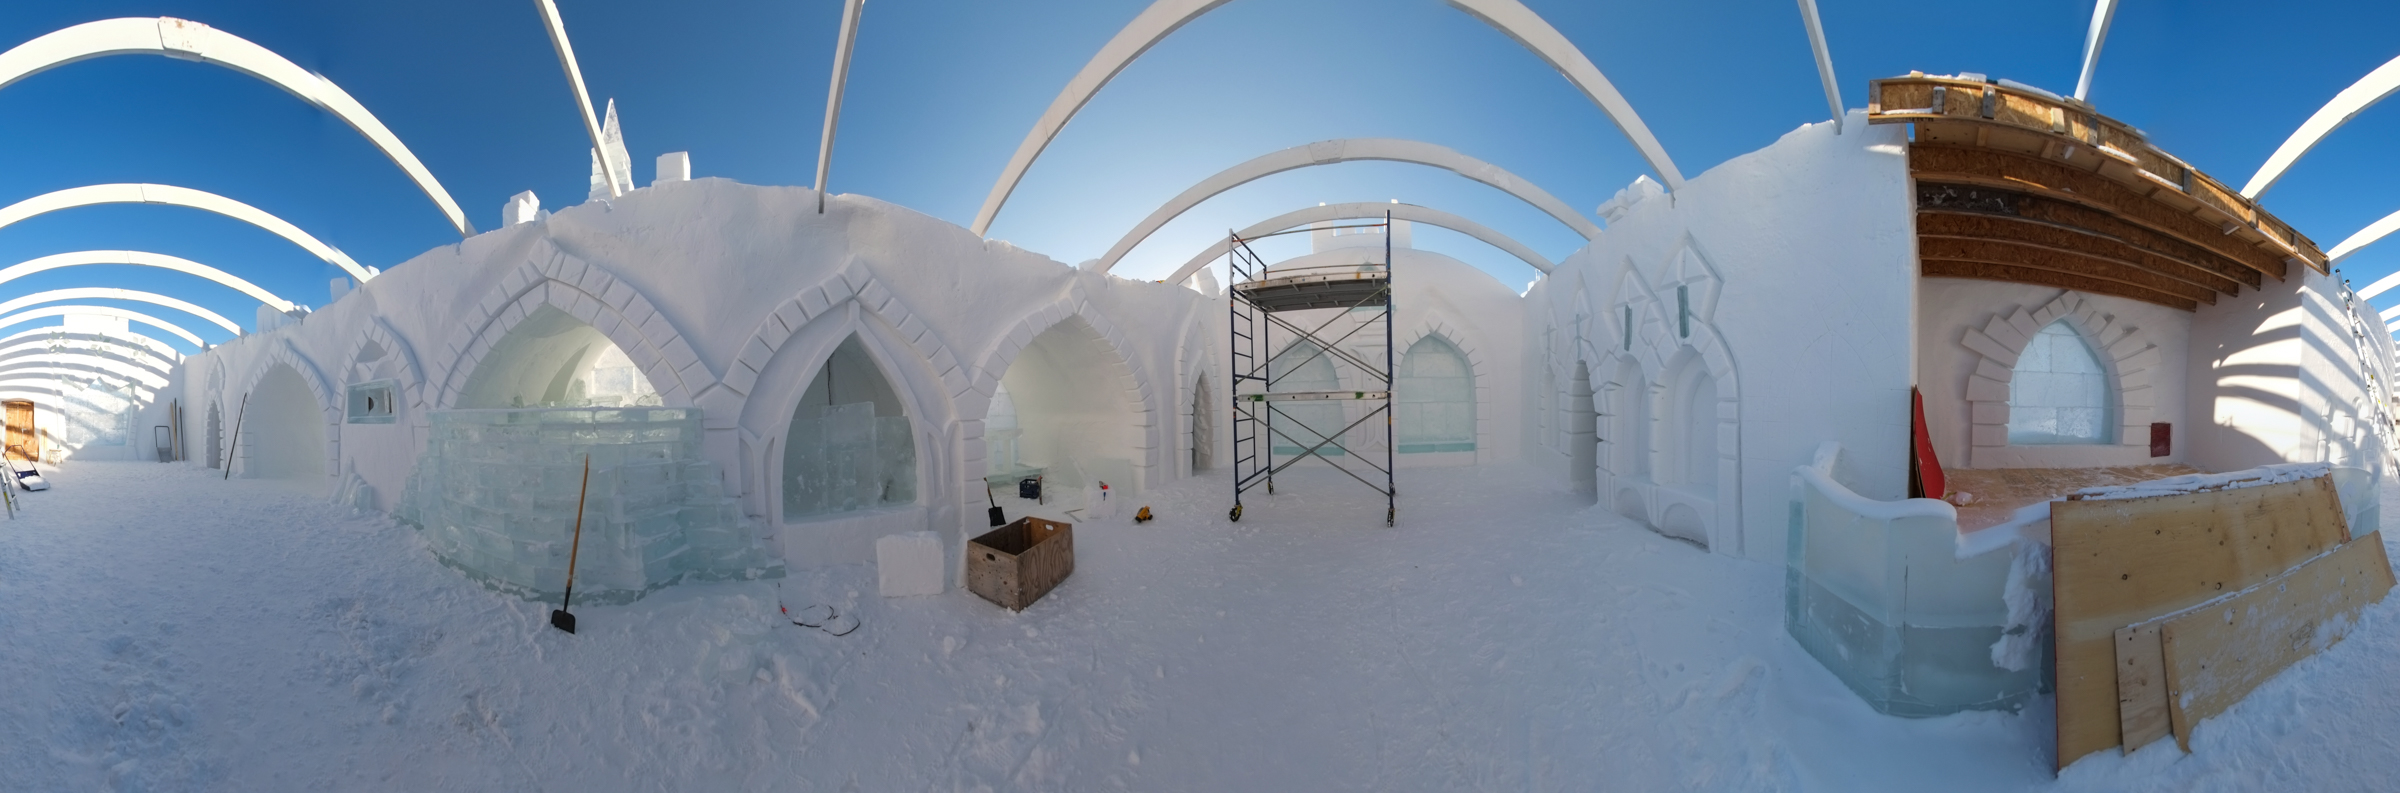
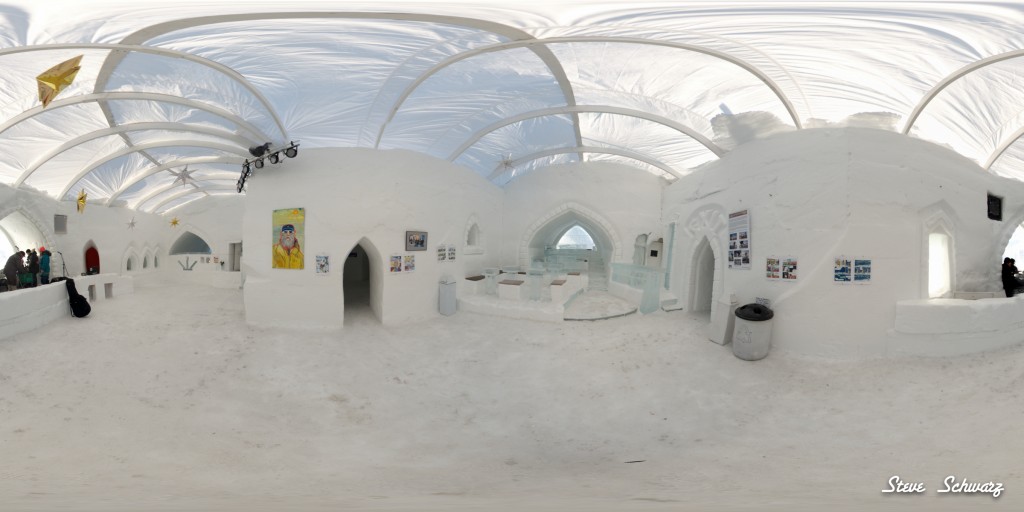
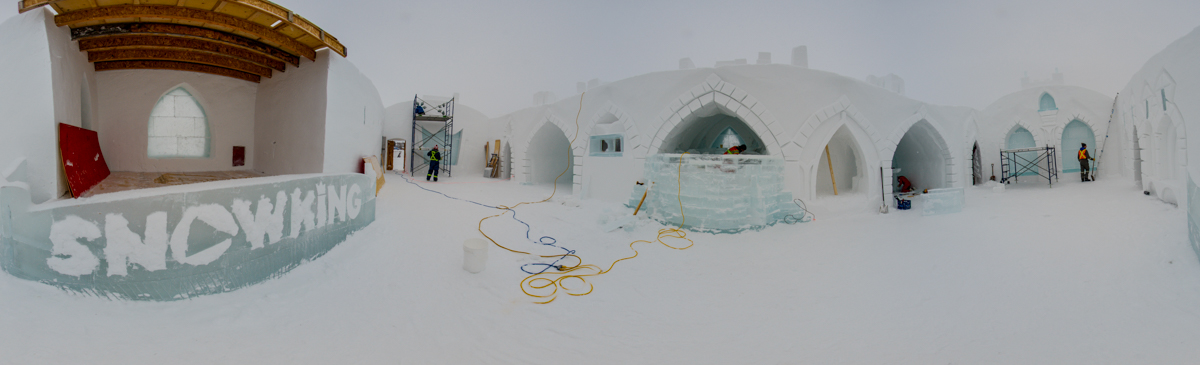
A view of the inside of the Snowking’s Castle, during the 19th annual Snowking Winter Festival. Click on the image for a larger view. To view the 360 degree animation. Click Here. This requires the QuickTime Player. Click the icon on the upper right corner of the animation to get a full view. Depending on network speed, the image may take a moment to load.
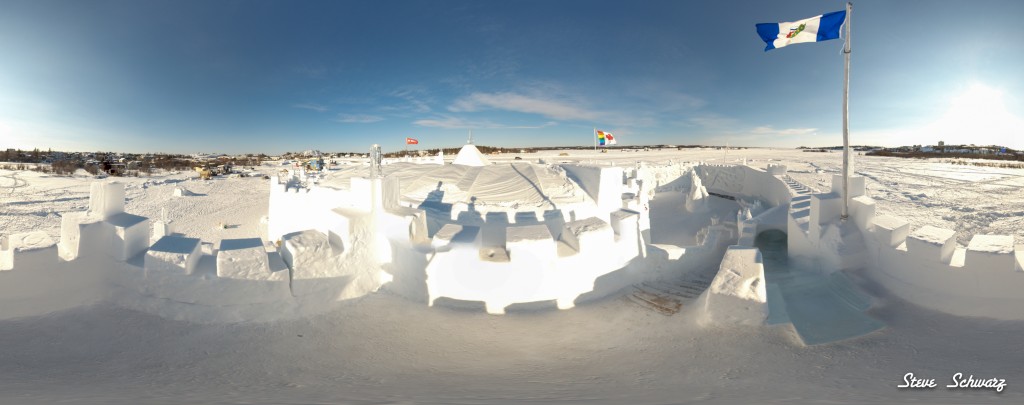
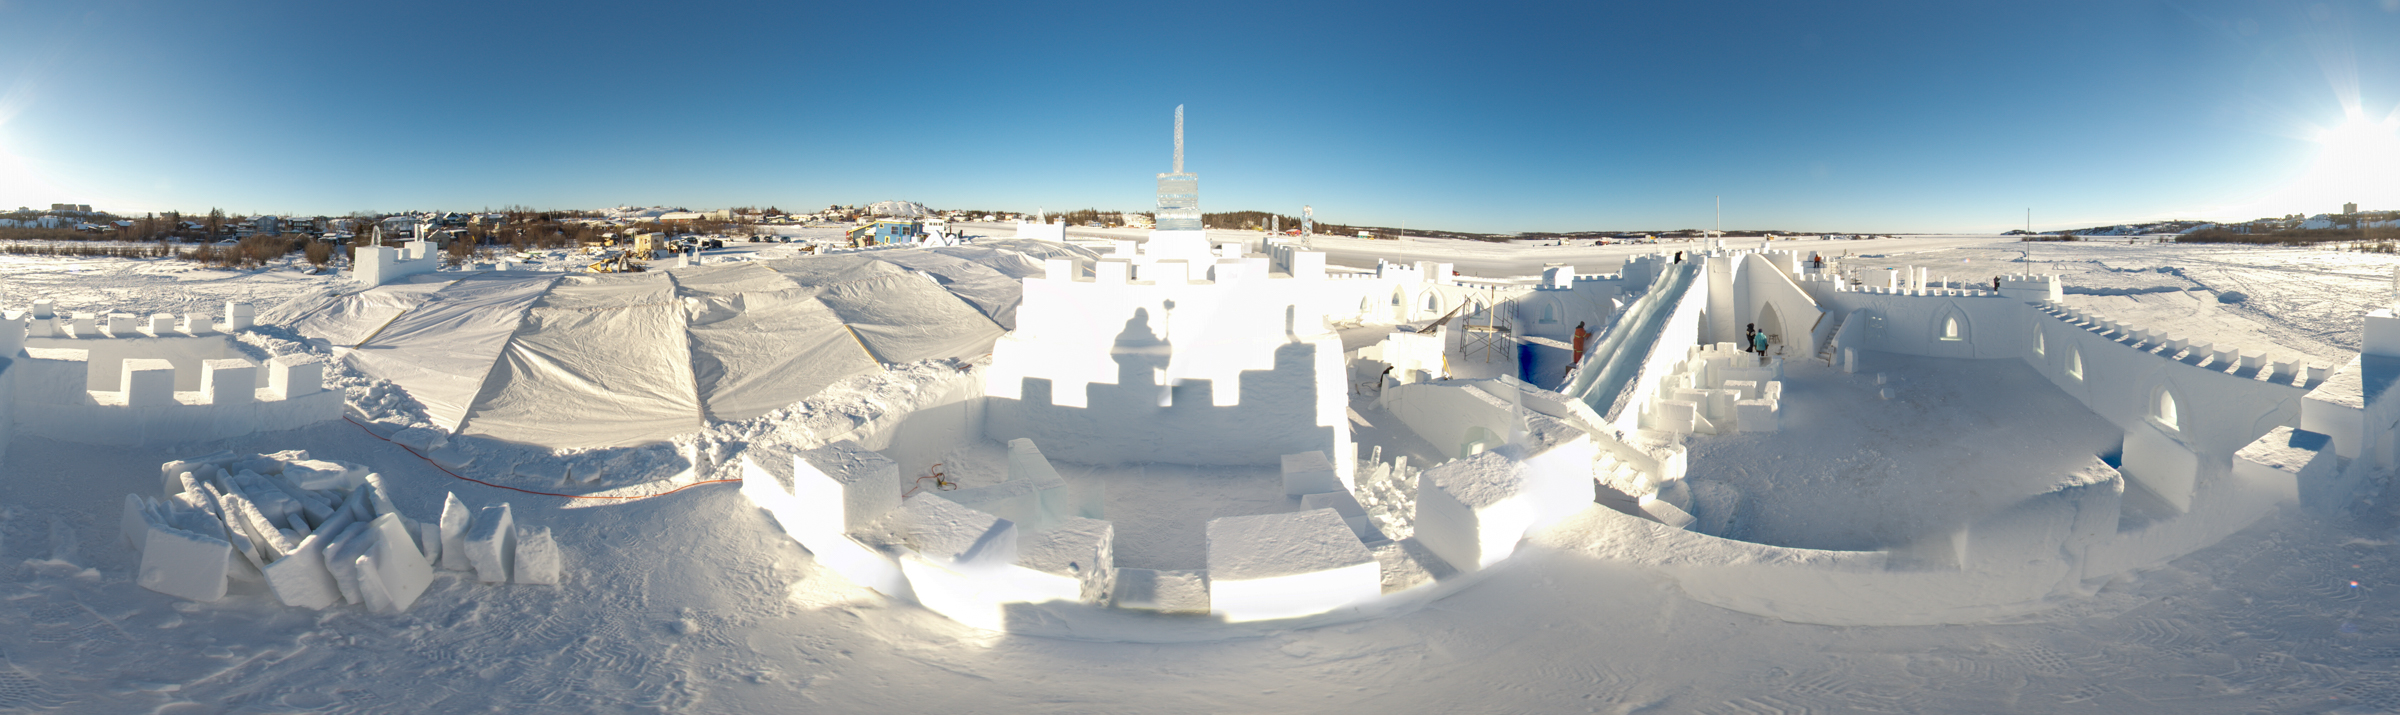
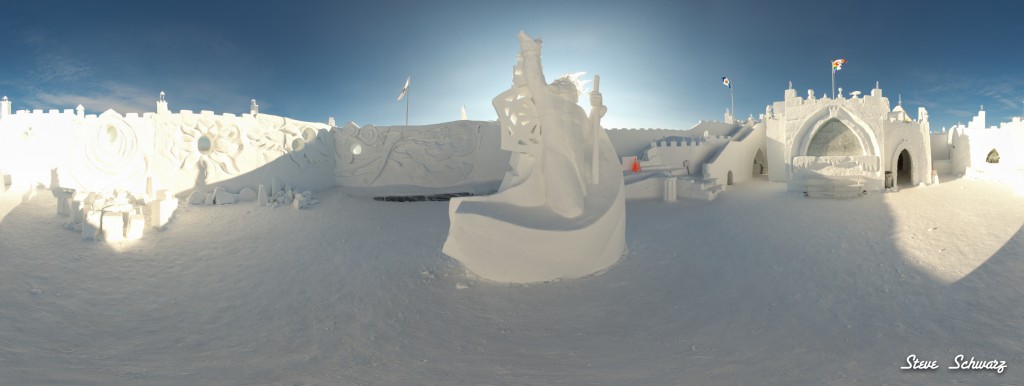
The view from the top of the Castle, and the “Deadman’s slide”. Click on the image for a larger view.
To view the 360 degree animation. Click Here. This requires the QuickTime Player. Click the icon on the upper right corner of the animation to get a full view. Depending on network speed, the image may take a moment to load.
Bullocks Bistro, in Old Town Yellowknife serves up the best fish in town, and is often featured on CBC Arctic Air. Can’t think of too many restaurants that actually let you, and encourage you to leave your mark on the ceilings and walls !.
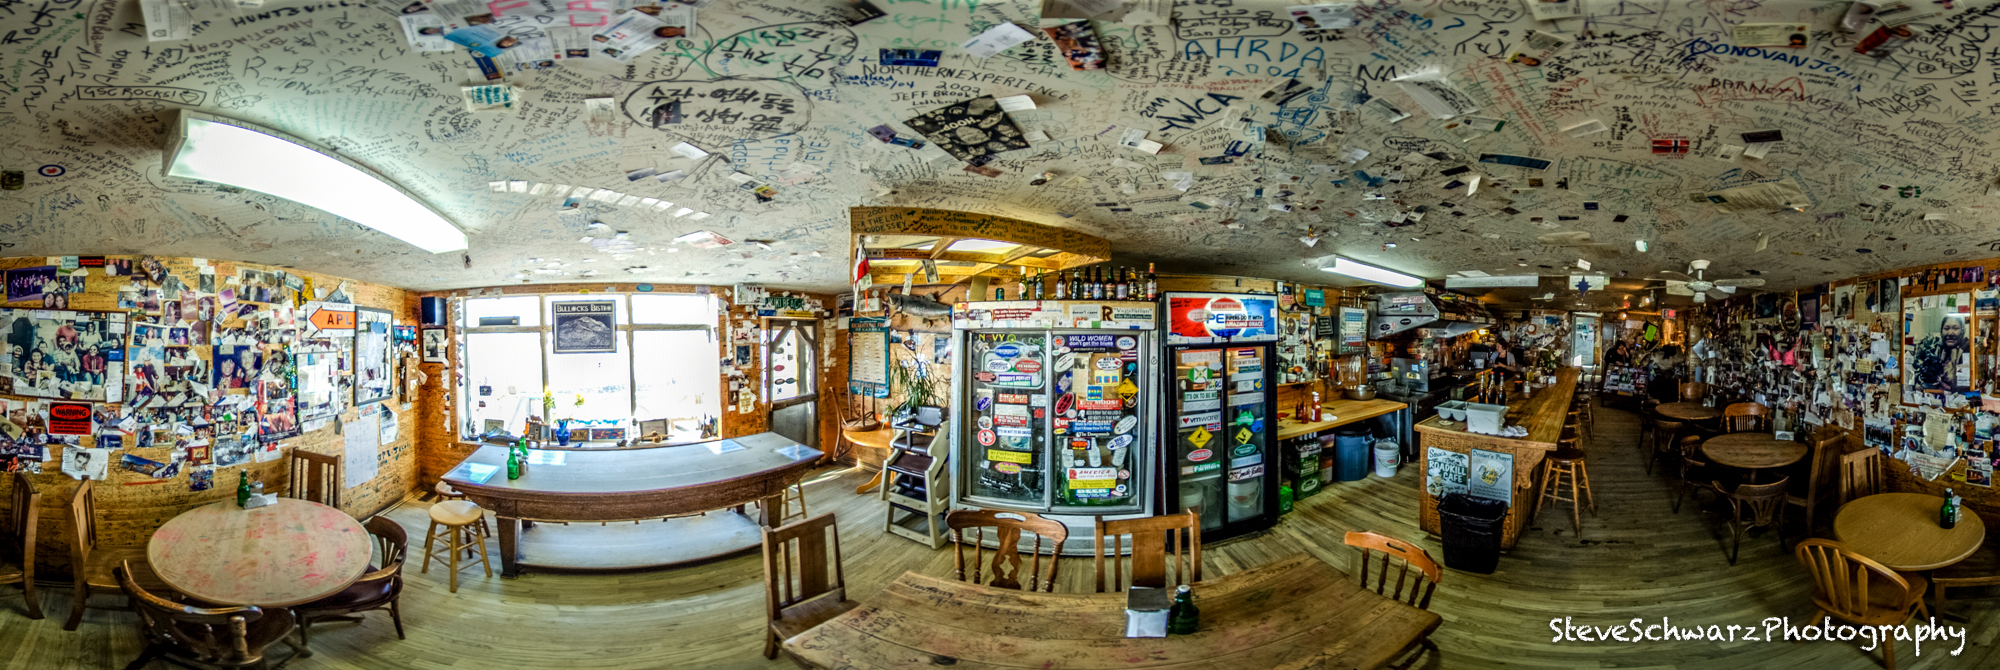 Click on the image to see it bigger.
To view a 360 degree animation of this scene, Click Here. This requires the QuickTime Player. Click the icon on the upper right corner of the animation to get a full view. Depending on network speed, the image may take a moment to load.
Everyone’s favorite place to be on a hot sunny day….The Beer Garden (2012 Folk on the Rocks)

To view the 360 degree animation of “Snake People” in the Beer Gargen . Click Here This requires the QuickTime Player. Click the icon on the upper right corner of the animation to get a full view.


 A split view of the Main Stage.
 A view of the Cultural Stage. Click on the image for a larger view.
 “Little Planet” view of the Kids Stage. Click on the image for a larger view. Click ‘back’ on your browser to return to this page.

