Create a Neutral Density Filter for Under $10
For those that follow this Blog – You know that I like to modify and build custom tools for my camera gear.
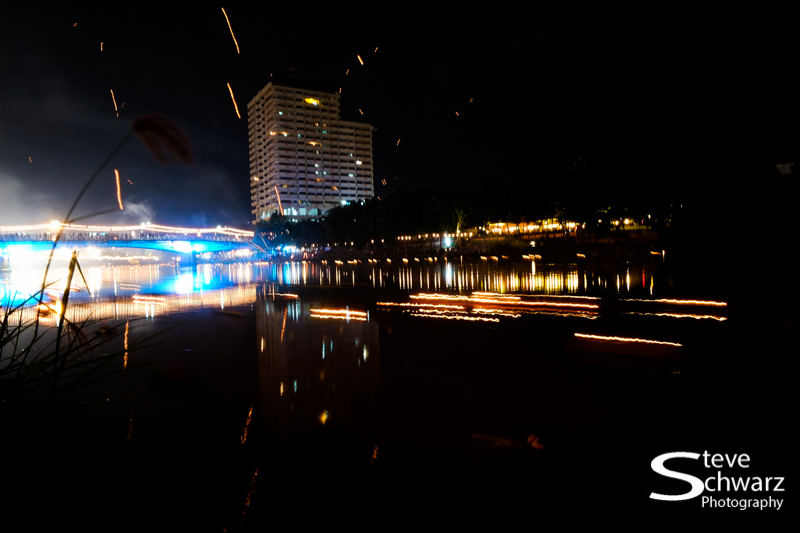
A couple of years ago I fell in love with the look of long exposure black and white images that are both in focus and anything moving like waves on beach, waterfalls are gently blurred. The photos I’d seem were all taken with a LEE “Big Stopper” 10 stop Neutral Density (ND) filter all taken in the middle of the day!. Neutral Density filters reduce the amount of light entering the camera lens, making it possible to get long exposure times needed to blur moving water, clouds and my favorite, boats and airplanes tied up to a dock. ND filters are made by several manufactures; such as B+W, Cokin, Hoya, Singh-ray and LEE in either a circular screw-in filter, or as a sheet of glass that slides into a holder. ND filters are not cheap, and good quality ND filters can cost a couple hundred dollars.
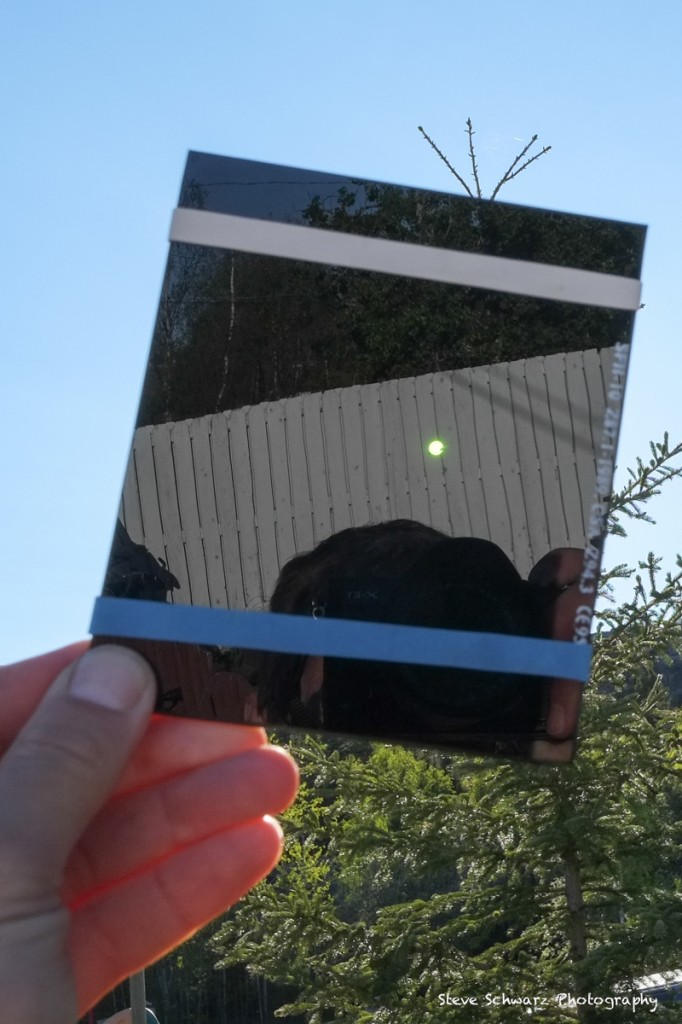
Several bloggers have described how to use welding glass as a ND filter to achieve a similar effect by blocking out light so you can shoot day time long exposures. Using welding glass as a ND Filter is not a new idea. So – keen to do some experimenting, I bought a piece of 4¼ x 3¼ welding glass from a local hardware store for $10.
If you want to use welding glass as a ND filter, there are a couple of things to know.
1) Welder’s glass filters come in different strengths from 6 stop to 13 stops. Other grades of welding glass are:
#8 = 10 stops,
#9 = 11.5 stops
#10 = 13 stops
Choose a strength depending upon your needs, remembering that a #10 needs much more light than a #9 filter. The welding glass that I got was a #10 grade and it is tinted a dark shade of green.
2) Welding glass filters are designed to fit standard size welding masks, not photography (Cokin and LEE) filter holders. With typical exposure times between 2 to 5 minutes, you don’t want to be hand holding the filter. One way to attach the filter to lens is with thick rubber bands, around the sides of the welding glass and around the lens hood. Depending on your lens hood, it might be easier to flip the lens hood backwards so the petals are facing towards the back of the camera (typical storage position) and hook the rubber bands around two petals. Or, if this doesn’t work, some folks wrap the elastic bands around the back of the camera.
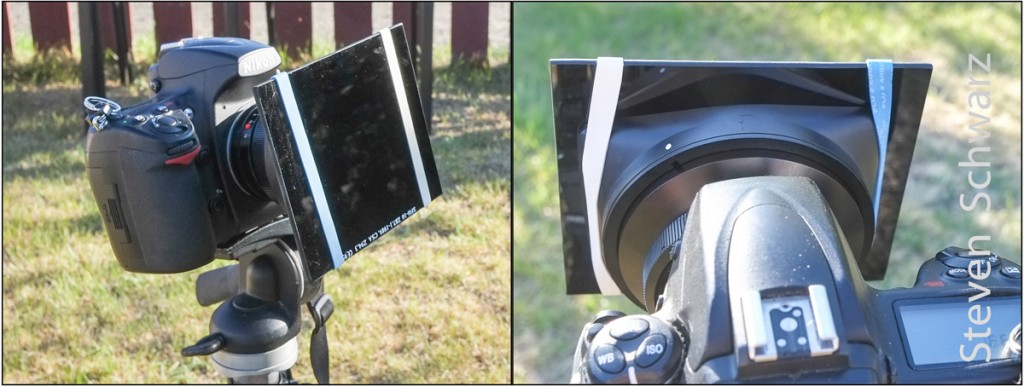
Welding glass filter held in-place with rubber bands.
3) Welding glass filters are very reflective and any light leaks will cause lens flare (streaking or bright spots). To avoid this problem, simply attach the filter to the lens using one of the methods described above, then drape a dark light-proof cloth over the camera, lens, and the corners of the welder’s glass to prevent light from leaking in through the crack in between your lens and the glass.
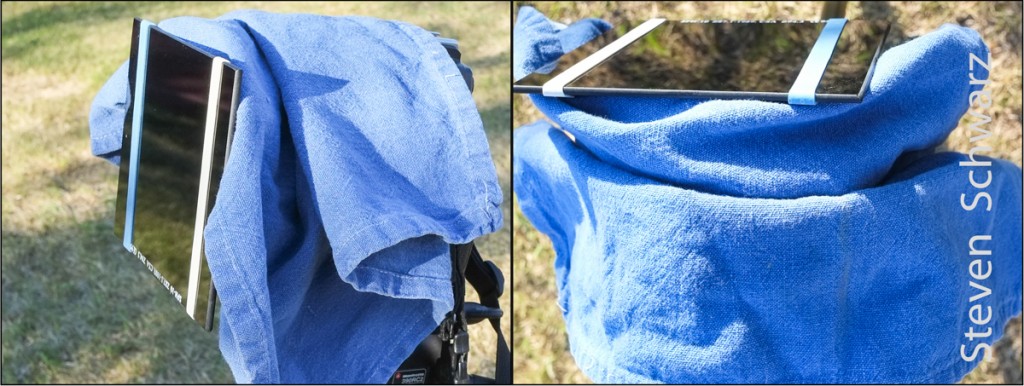
Light-proof cloth on camera, lens a welding glass to reduce reflections.
4) The fourth problem with using Welding glass filters is getting rid of the green hue. We will show you how to get rid of this in post-processing below.
What you need to make long exposure images
• Digital camera with the ability to shoot in bulb mode
• Camera lens – any lens will work, except ultra wide angle and fisheye lenses.
• Welding glass filter
• Thick rubber bands – I use the thick blue rubber bands from produce
• Light-proof cloth –
• Tripod
• Remote shutter release. Since the maximum exposure time on most digital cameras is 30 seconds, adding a remote shutter release will allow you to get an exposure time longer than 30 seconds.
• Viewfinder cover for camera – to prevent stray light from entering
• Stop watch to time the exposure length.
Taking long exposures with a Welding Glass Filter
1) Find a scene with movement in it, like water, clouds, or people.
2) Set your camera up on your tripod and compose your shot. After adding the welding glass, you will not be able to see out of your viewfinder.
3) Set camera to manual exposure, RAW, auto white balance and autofocus off. RAW setting allows more colour adjustment during post-processing (see notes below). Focus, then set autofocus off to prevent the lens from searching for focus once the welding filter is attached. Set lens aperture to f/10-13, and lowest normal ISO.
4) Take a picture. View the image on the viewfinder and adjust exposure time if required.
5) Attach the welding glass to your lens (see notes above).
6) Cover the lens and the welding glass, and close the viewfinder eyepiece to help prevent light leaking into your lens (see notes above).
7) Attach the remote shutter release.
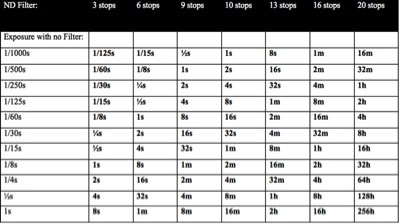
8) Set the camera to bulb mode, and estimate exposure based on the grade of the welding glass filter, and adding the appropriate exposure time to the previous exposure time. For example, if you are using a 10 stop ND and the first exposure was 1/125s second, then set the new exposure to 8 seconds. See the exposure chart below.
9) Take a picture using estimate exposure time. Depending on your shutter release, you might have to hold the shutter release the whole time. My shutter release, a Nikon MC-30 has a lock switch so I can lock the shutter open for long exposures.
10) View the photo on the LCD. Do not worry about the greenish color – that will be removed later. If the image is too light, add 30 seconds to the previous exposure time, of too dark – remove 30 seconds from the exposure time. There is no exact science to how long your exposure should be, but I’ve found that exposures in the 3 to 5 minute range work well.
11) Repeat if necessary to get correct exposure.
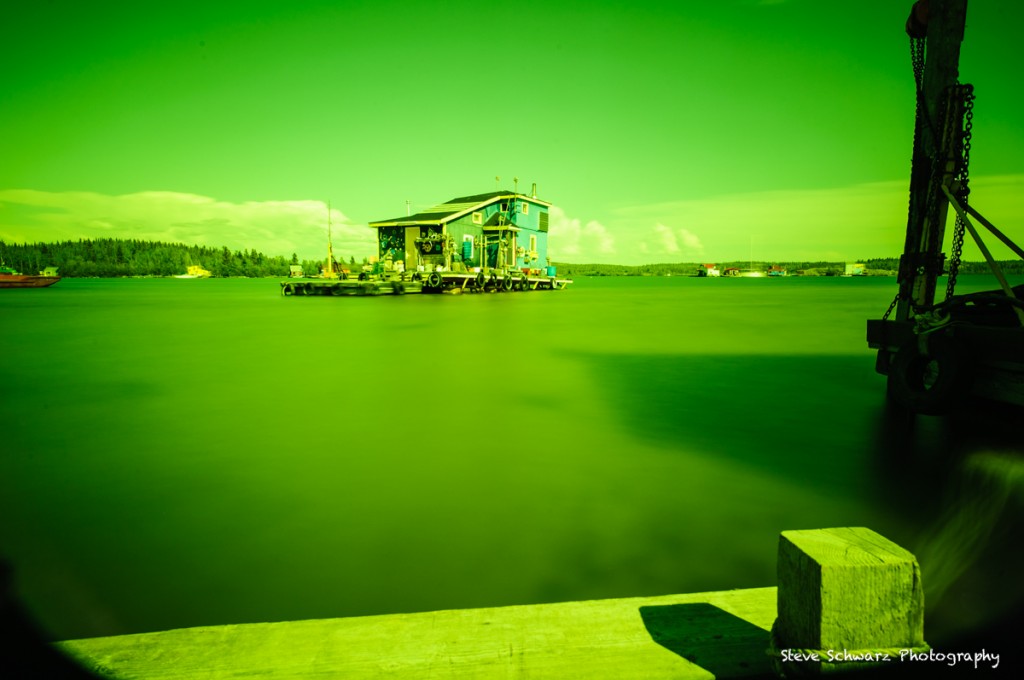
RAW image straight out of camera with green cast.
Post Processing: Removing the Green Color Cast
To remove the tint made by the welding glass, you can either turn it into a black and white image, or do some extra steps to re-create the colors in Photoshop or Lightroom. The reason for shooting in RAW is that White Balance can be modified in Lightroom and Photoshop.
To convert the images to Black & White
This is the easiest. Simply import the RAW files into Lightroom and Convert the image to black and white. Tweek the image as necessary to remove dust spots, adjust exposure, adjust contrast, sharpness, and highlights using the sliders in the basic panel.
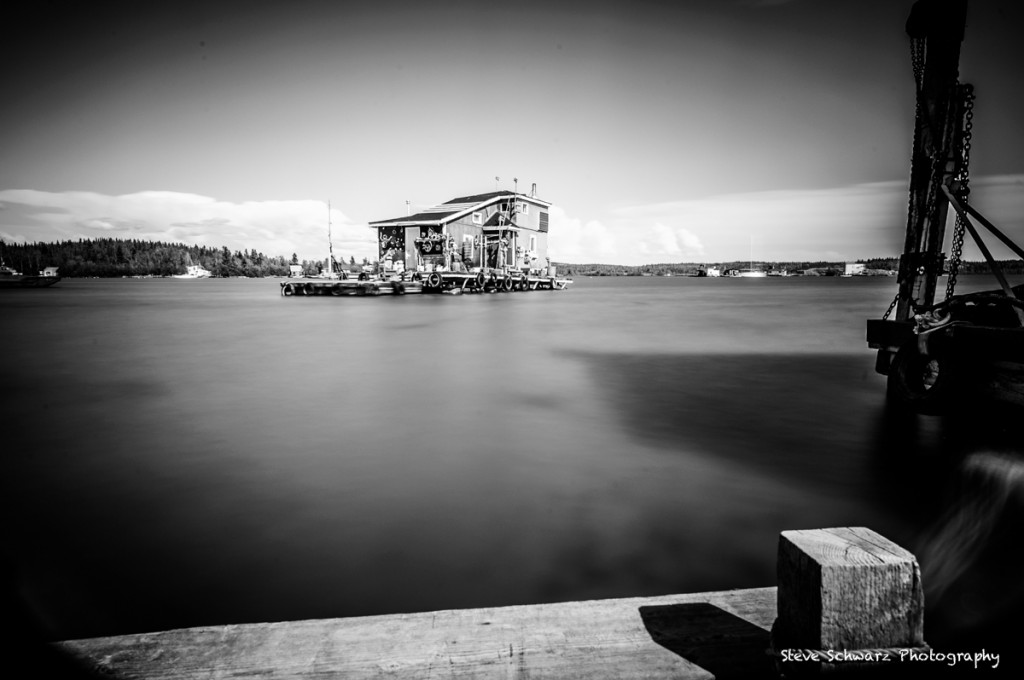
Image converted to black & white.
To re-create Color:
To re-create colors is a lot more work, and these are the settings that I use in Lighroom. (thanks to DazJW https://www.flickr.com/groups/weldingmaskglassfilter/discuss/72157626691948810/).
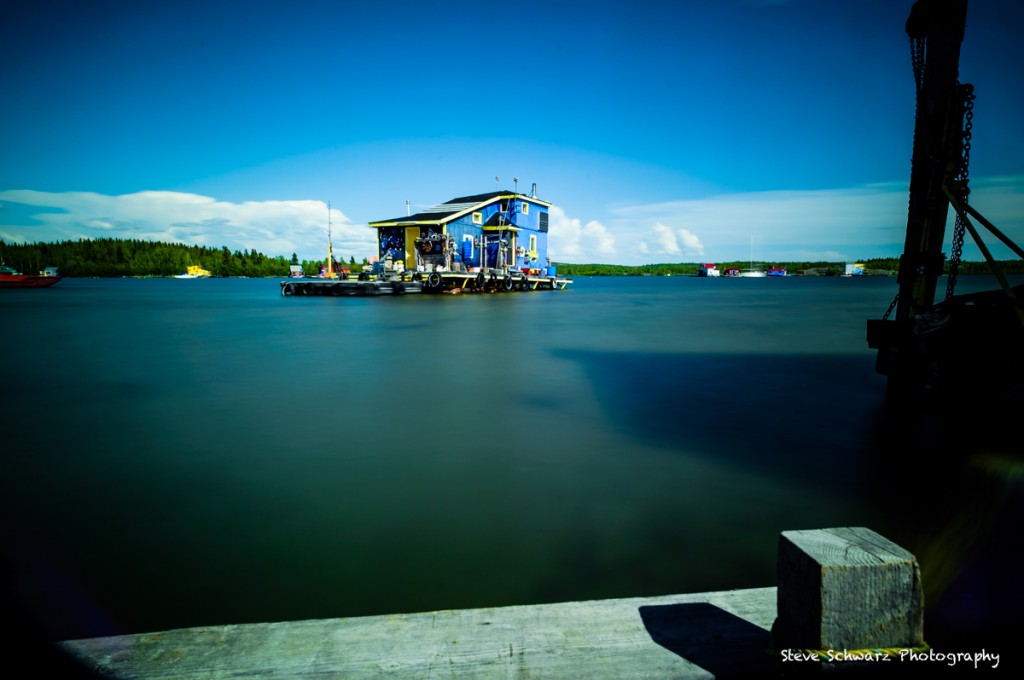
Colors re-created in Lightroom using adjustments listed below.
Basic
-White Balance
–Temp: 4900k
–Tint: +150
-Tone
–Contrast: +43
–Shadows: +21
-Presence
–Vibrance: +15
–Saturation: +15
Split Toning
-Highlights
–Hue: 291
–Saturation: 15
-Shadows
–Hue: 291
–Saturation: 15
Camera Calibration
-Process: 2012
-Profile: Adobe Standard
-Shadows, Tint: +2
-Red Primary, Saturation: +19
Save ….
Another way is to create Custom Camera Profile. I did not use this technique, though you can follow the links below to see how it is done.
Fifteen Kilobytes of Fame <http://15kb.blogspot.ca/> Saturday, 7 May 2011 Welding Glass and White Balance. <http://15kb.blogspot.ca/2011/05/welding-glass-and-white-balance.html>
DIY Photography <http://www.diyphotography.net/> Hacking Photography – one Picture at a time.
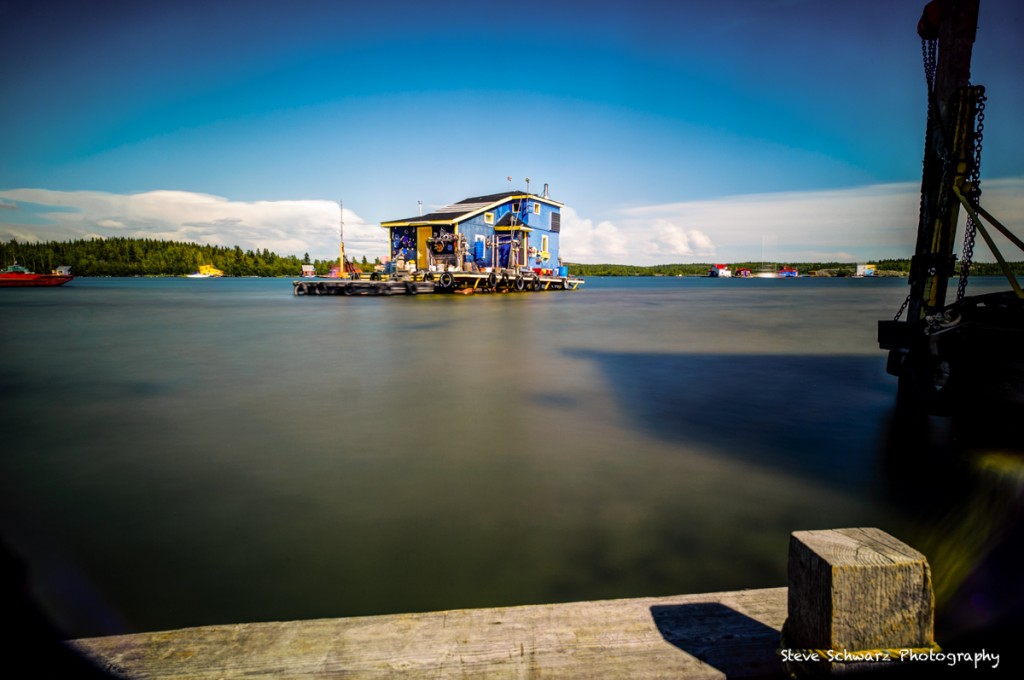
Final image using Lightroom tweeks, and custom white balance.
Summary
For $10, a welding glass filter used as a neutral density filter is a lot of fun, and goes a long way to re-creating the look of long exposure photographs taken during the mid-day sun. Are the results as good as a Pro-quality neutral density filter ? – probably not, though with a little bit of effort and a few precautions, the results are superb.